Send automated emails from your node.js app | Google OAuth2 and Nodemailer.
The best way to send automated emails from your website.

I was searching for a viable option for the contact form of my personal website, believe me this is the best you can do for your forms.
Get all the required secrets from Google Developer Console.
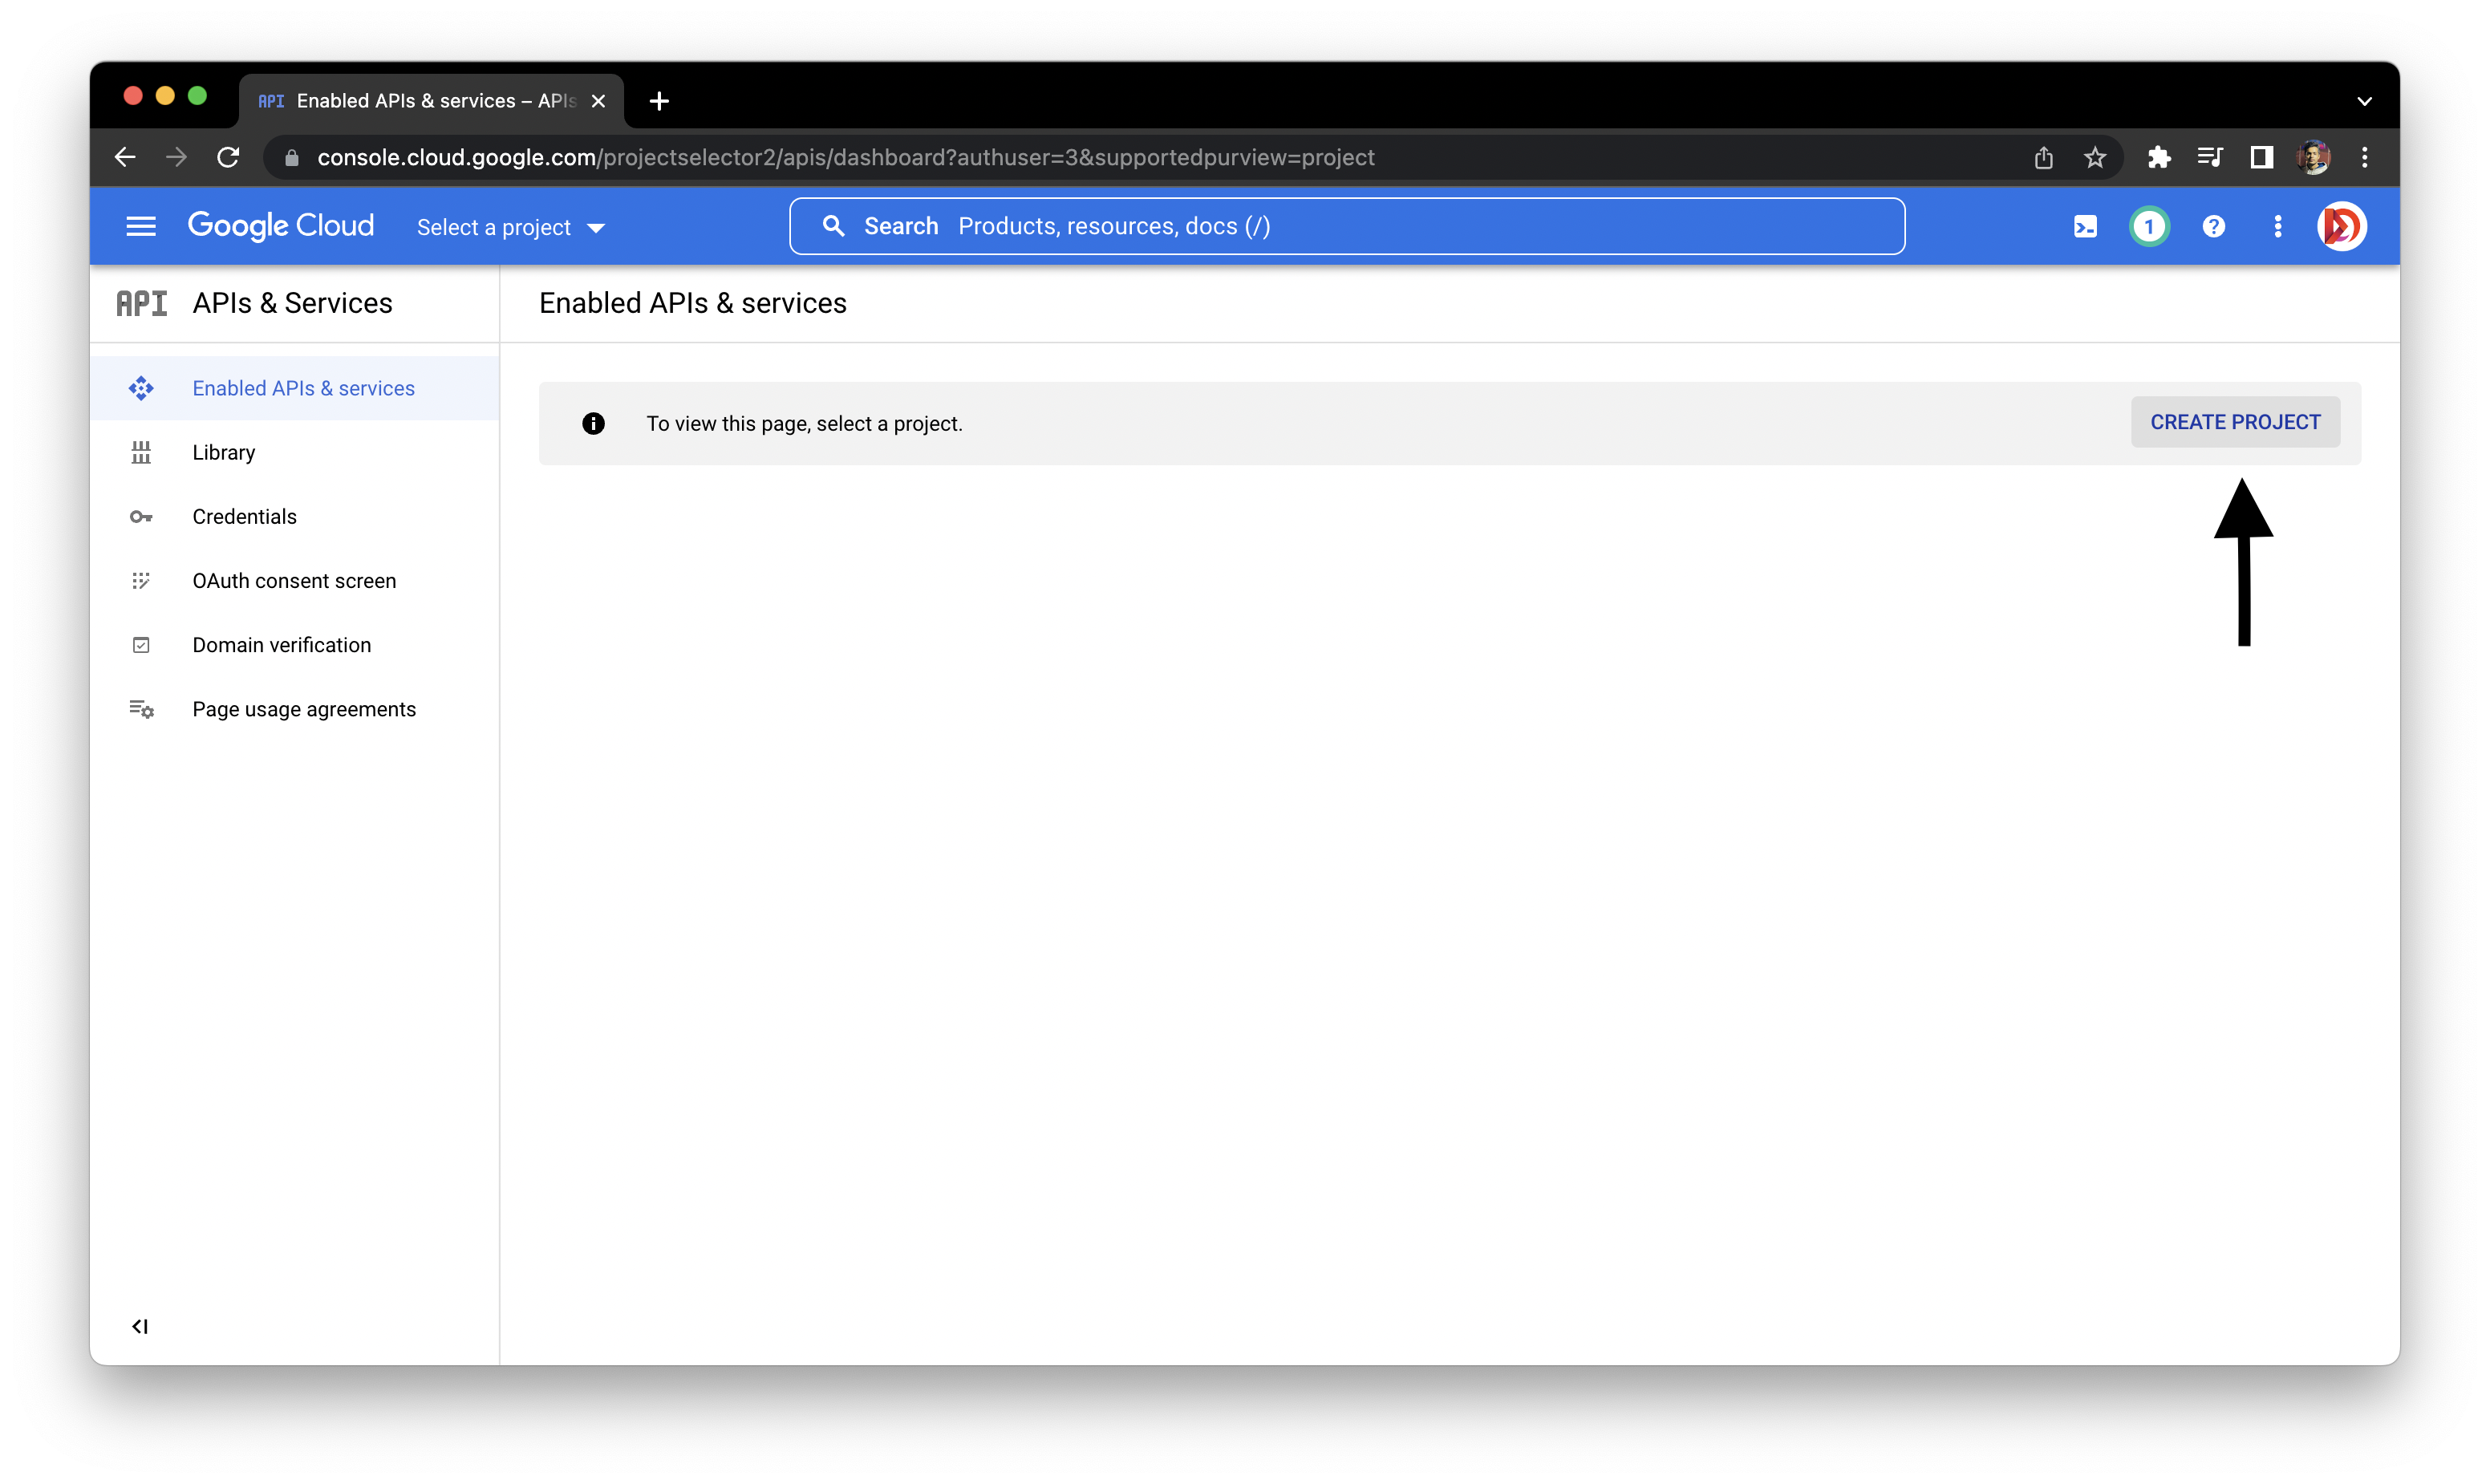
Before doing anything in our code we have to first create a project in the Google Developers Console.
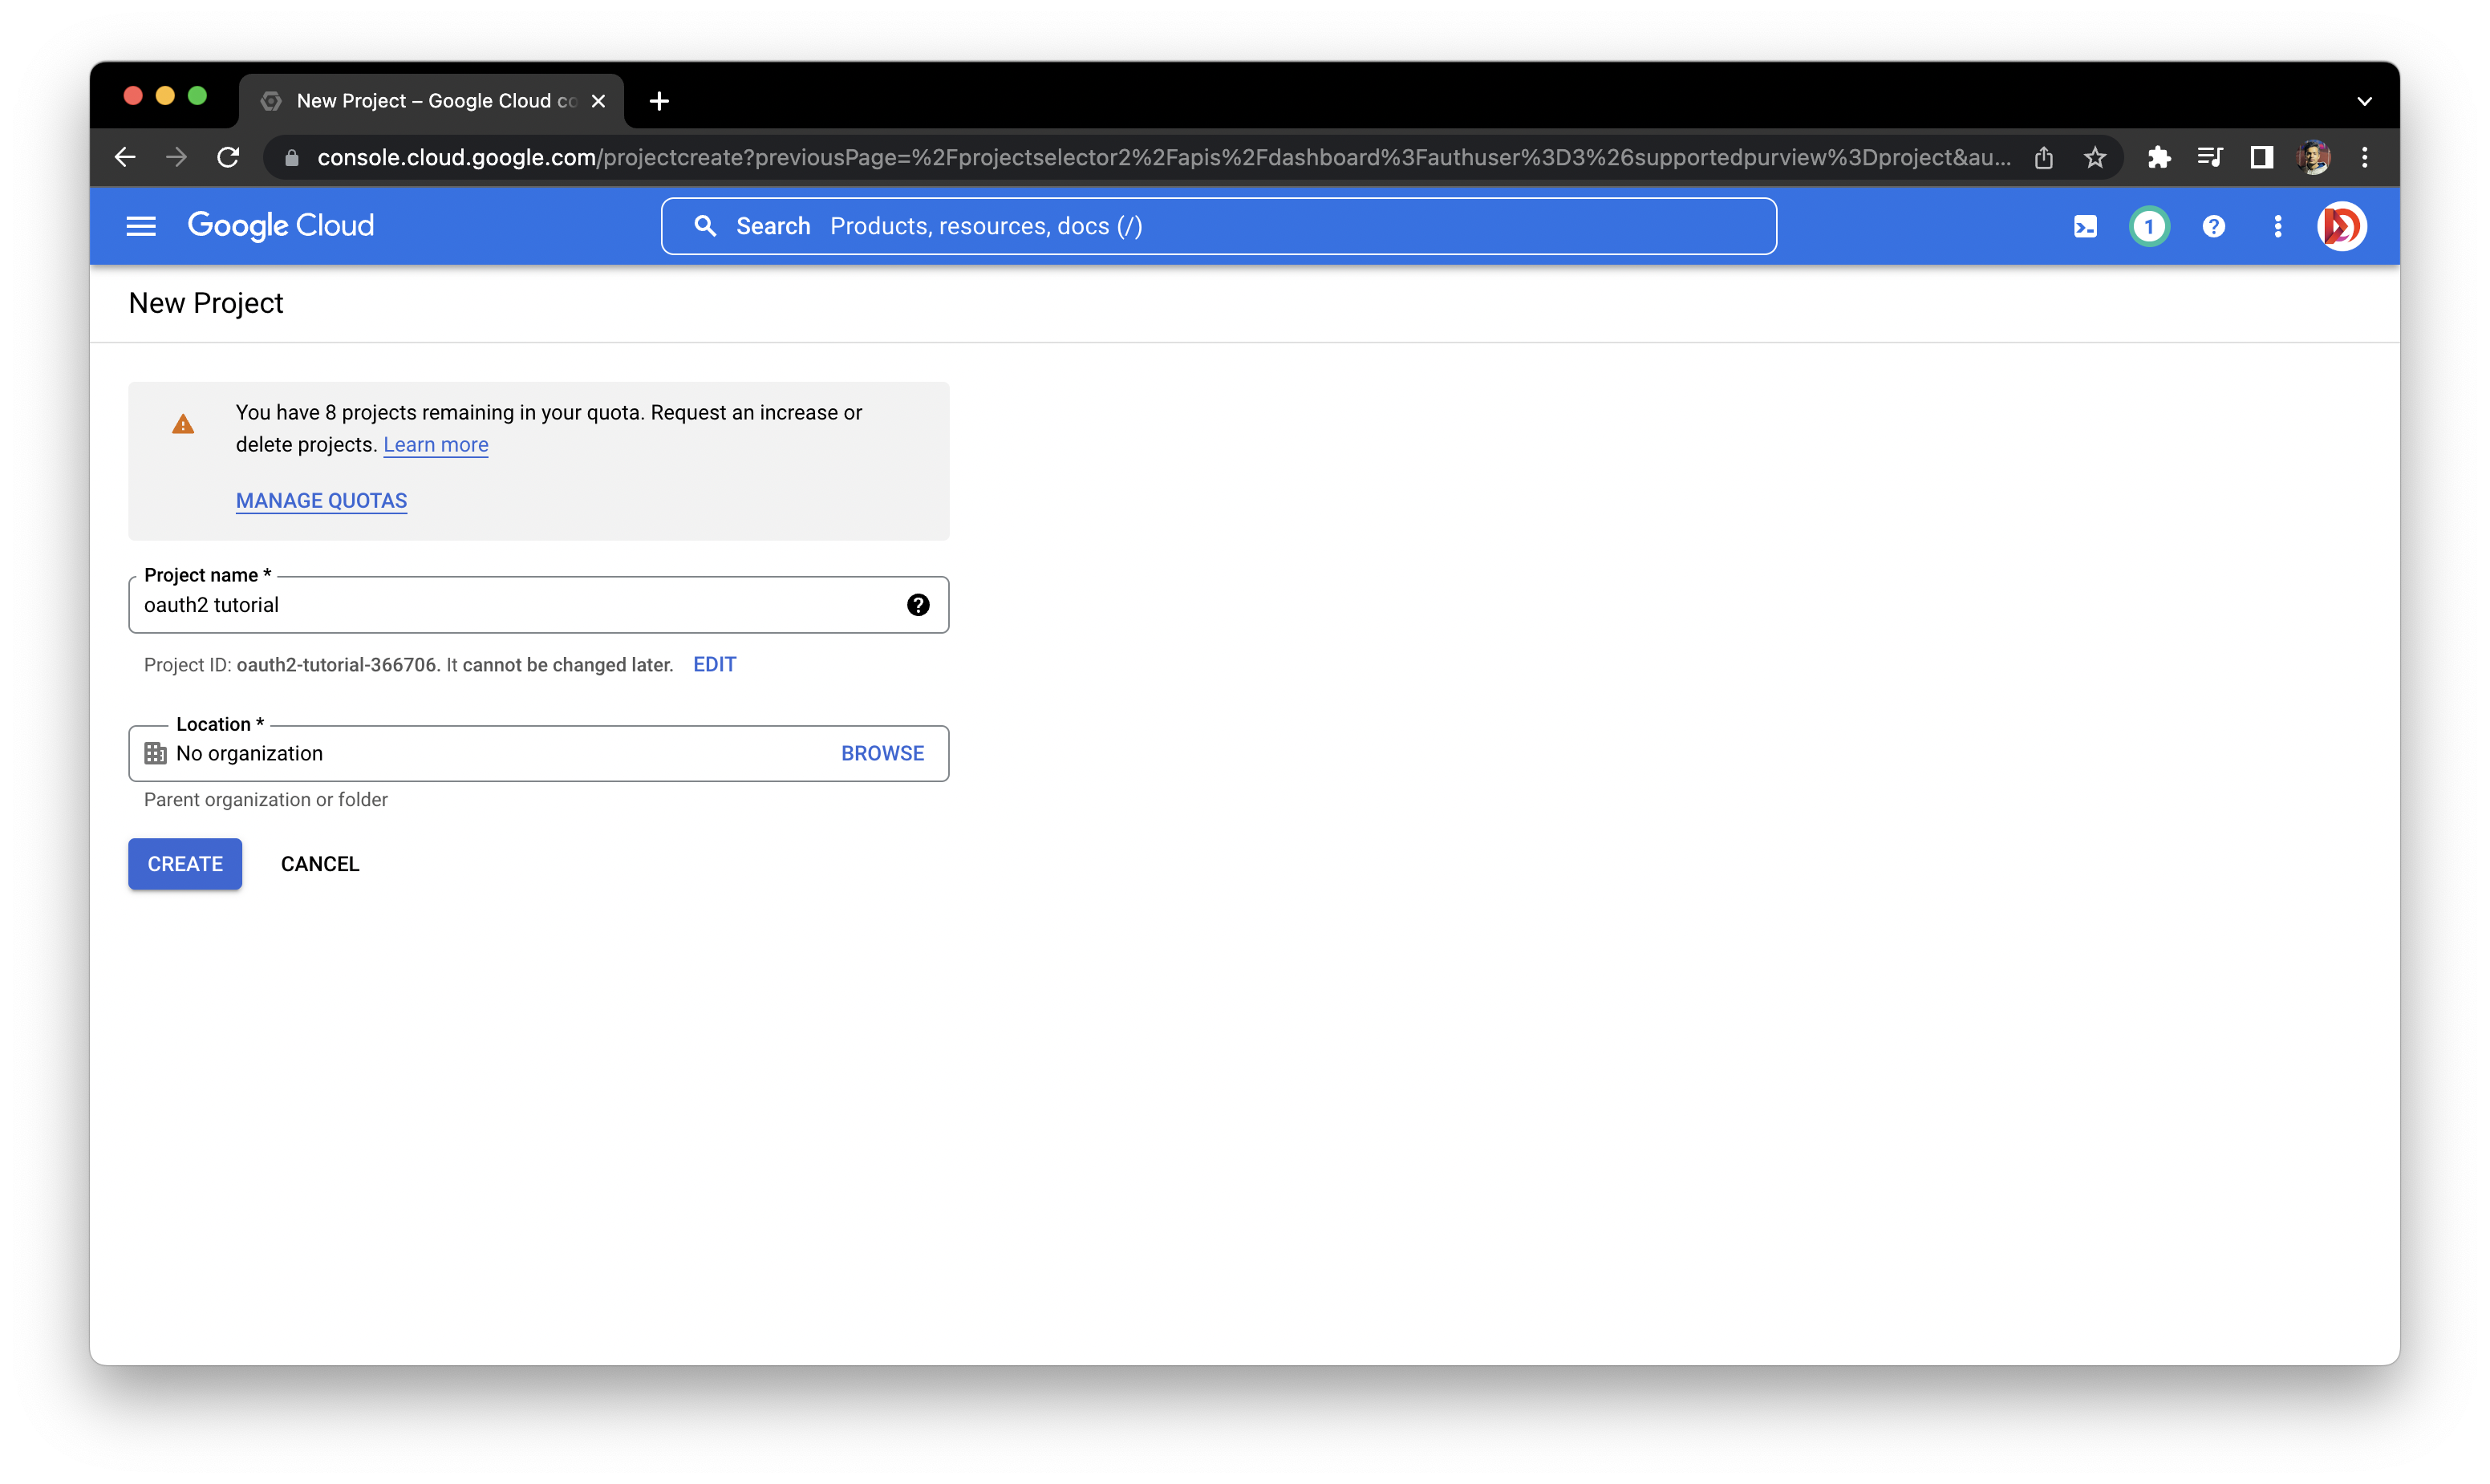
Create Project.
Rename the project.
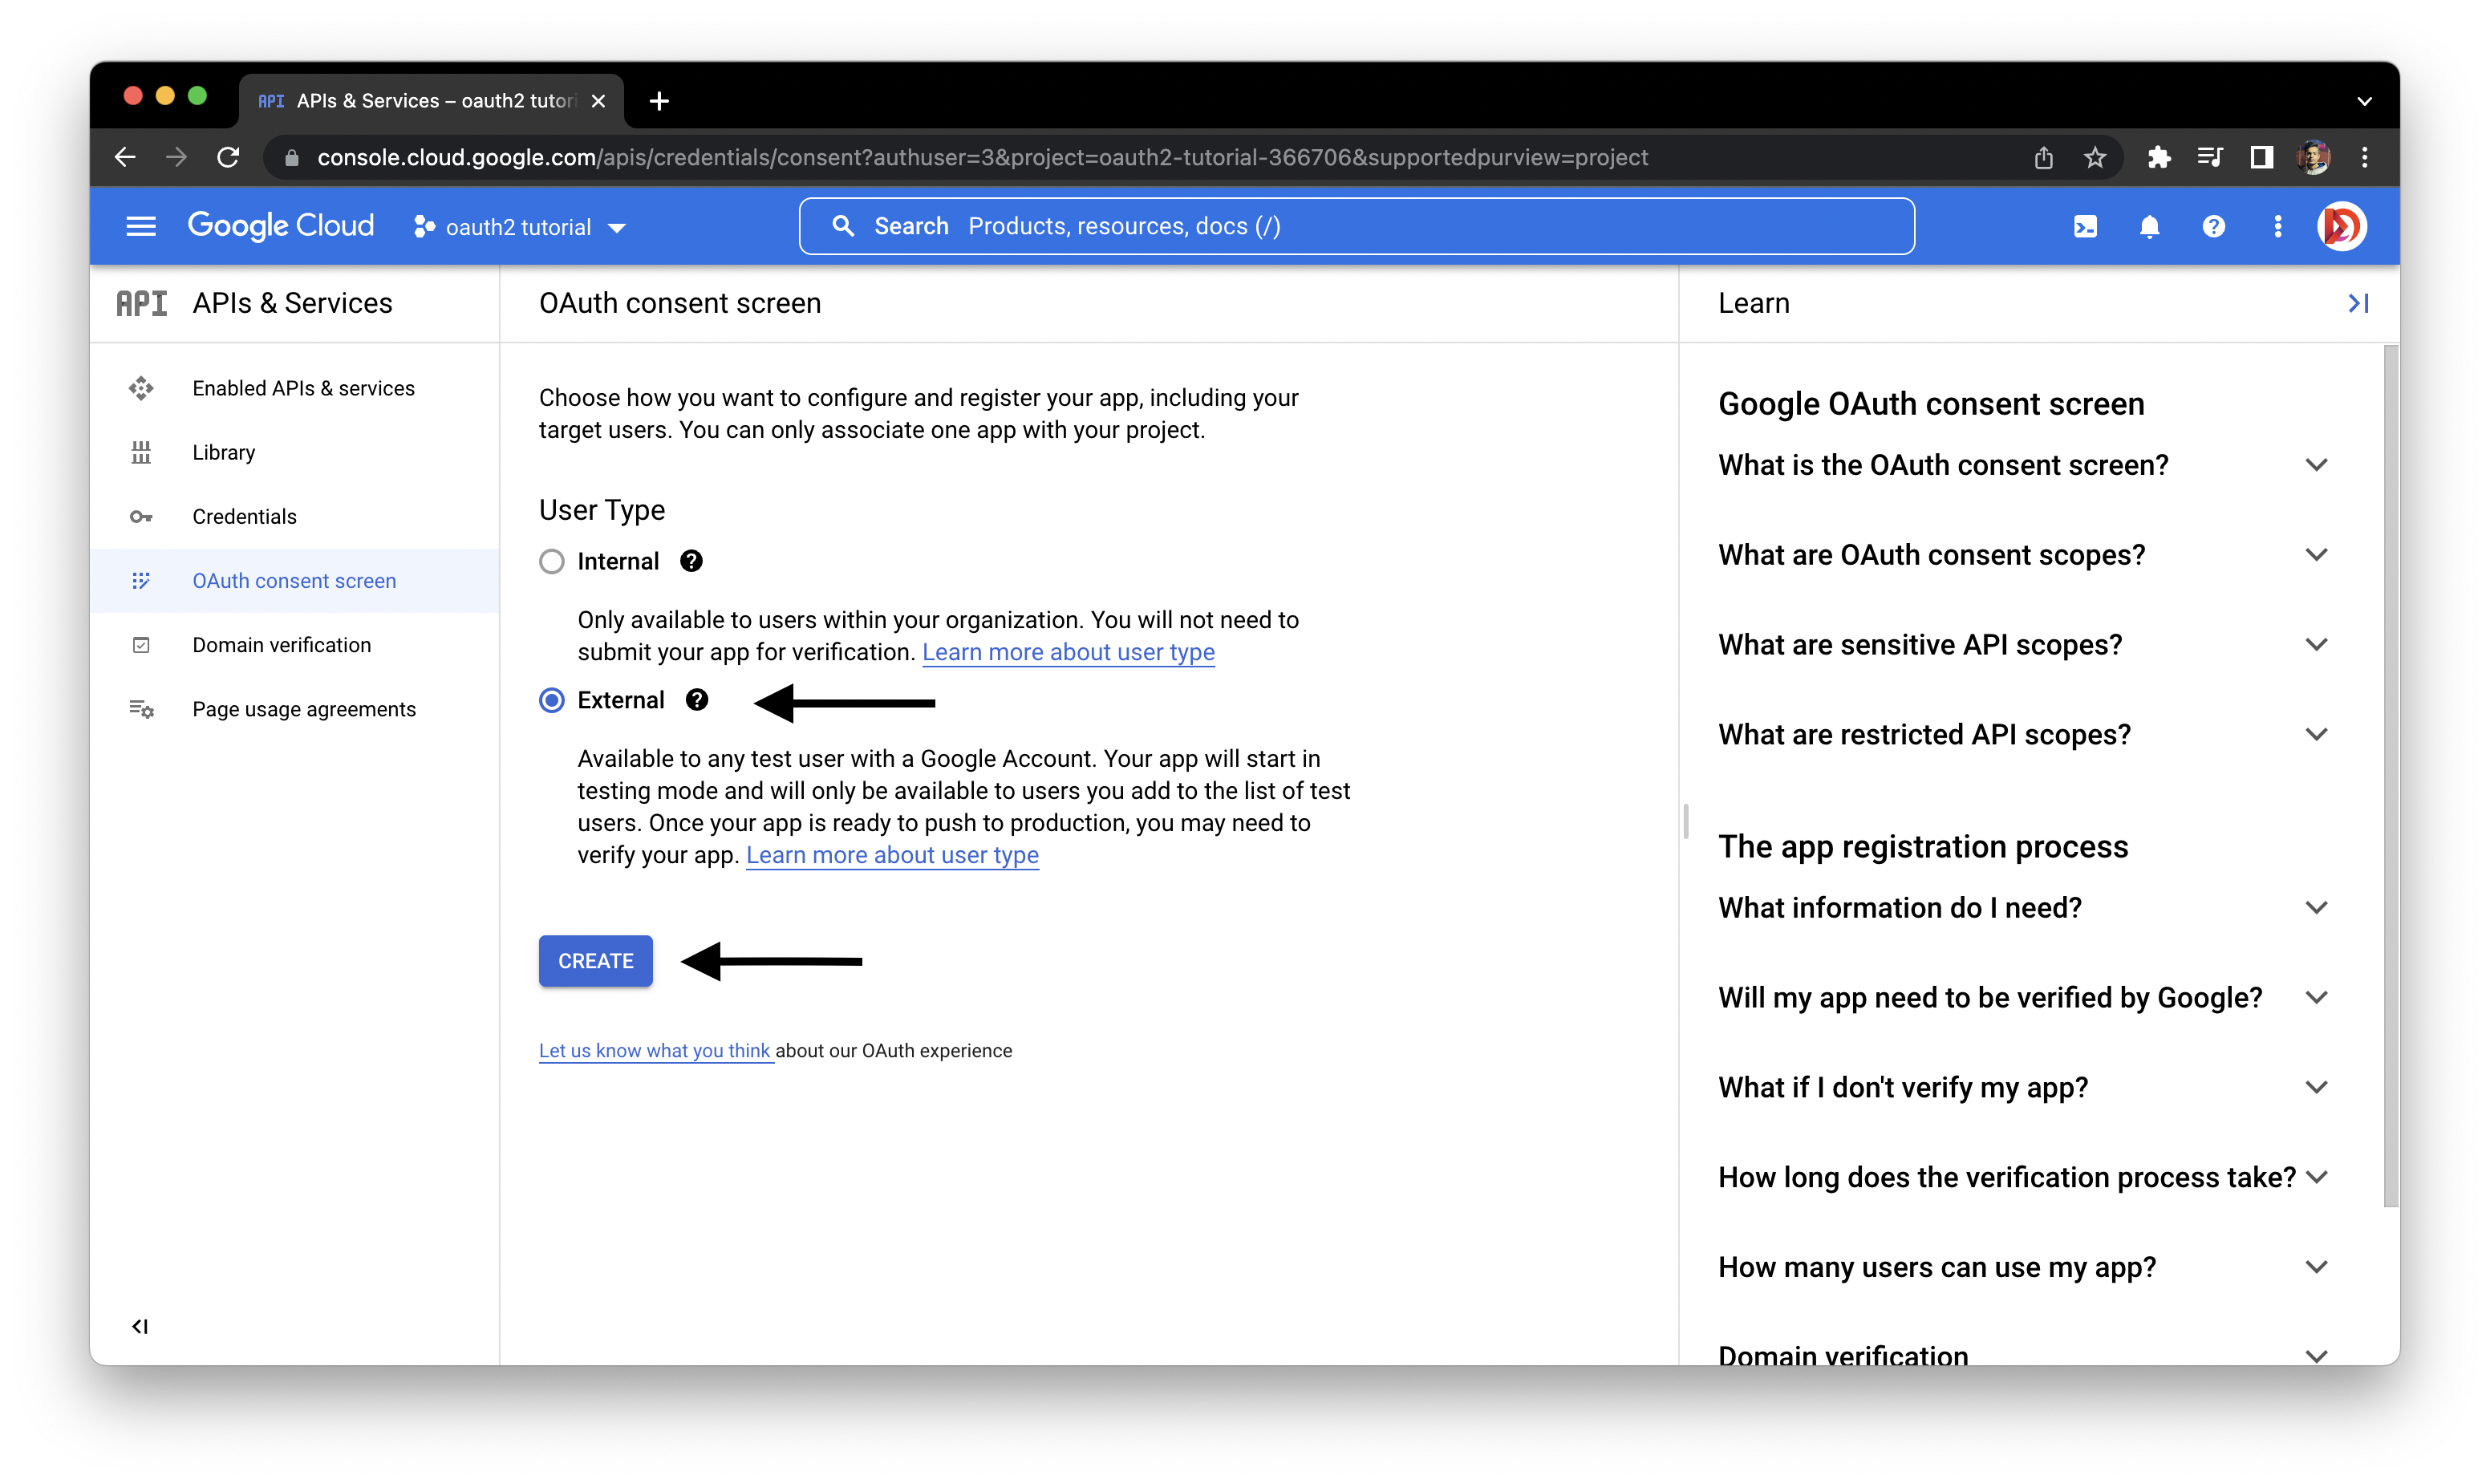
Configure the OAuth consent screen in the Test Mode.
You may need to verify your website to make it work in production mode as test secrets are only valid for 7 days.
- Select User Type as External and click CREATE.
- Fill only the mandatory fields for now as we want to stay in the test mode.
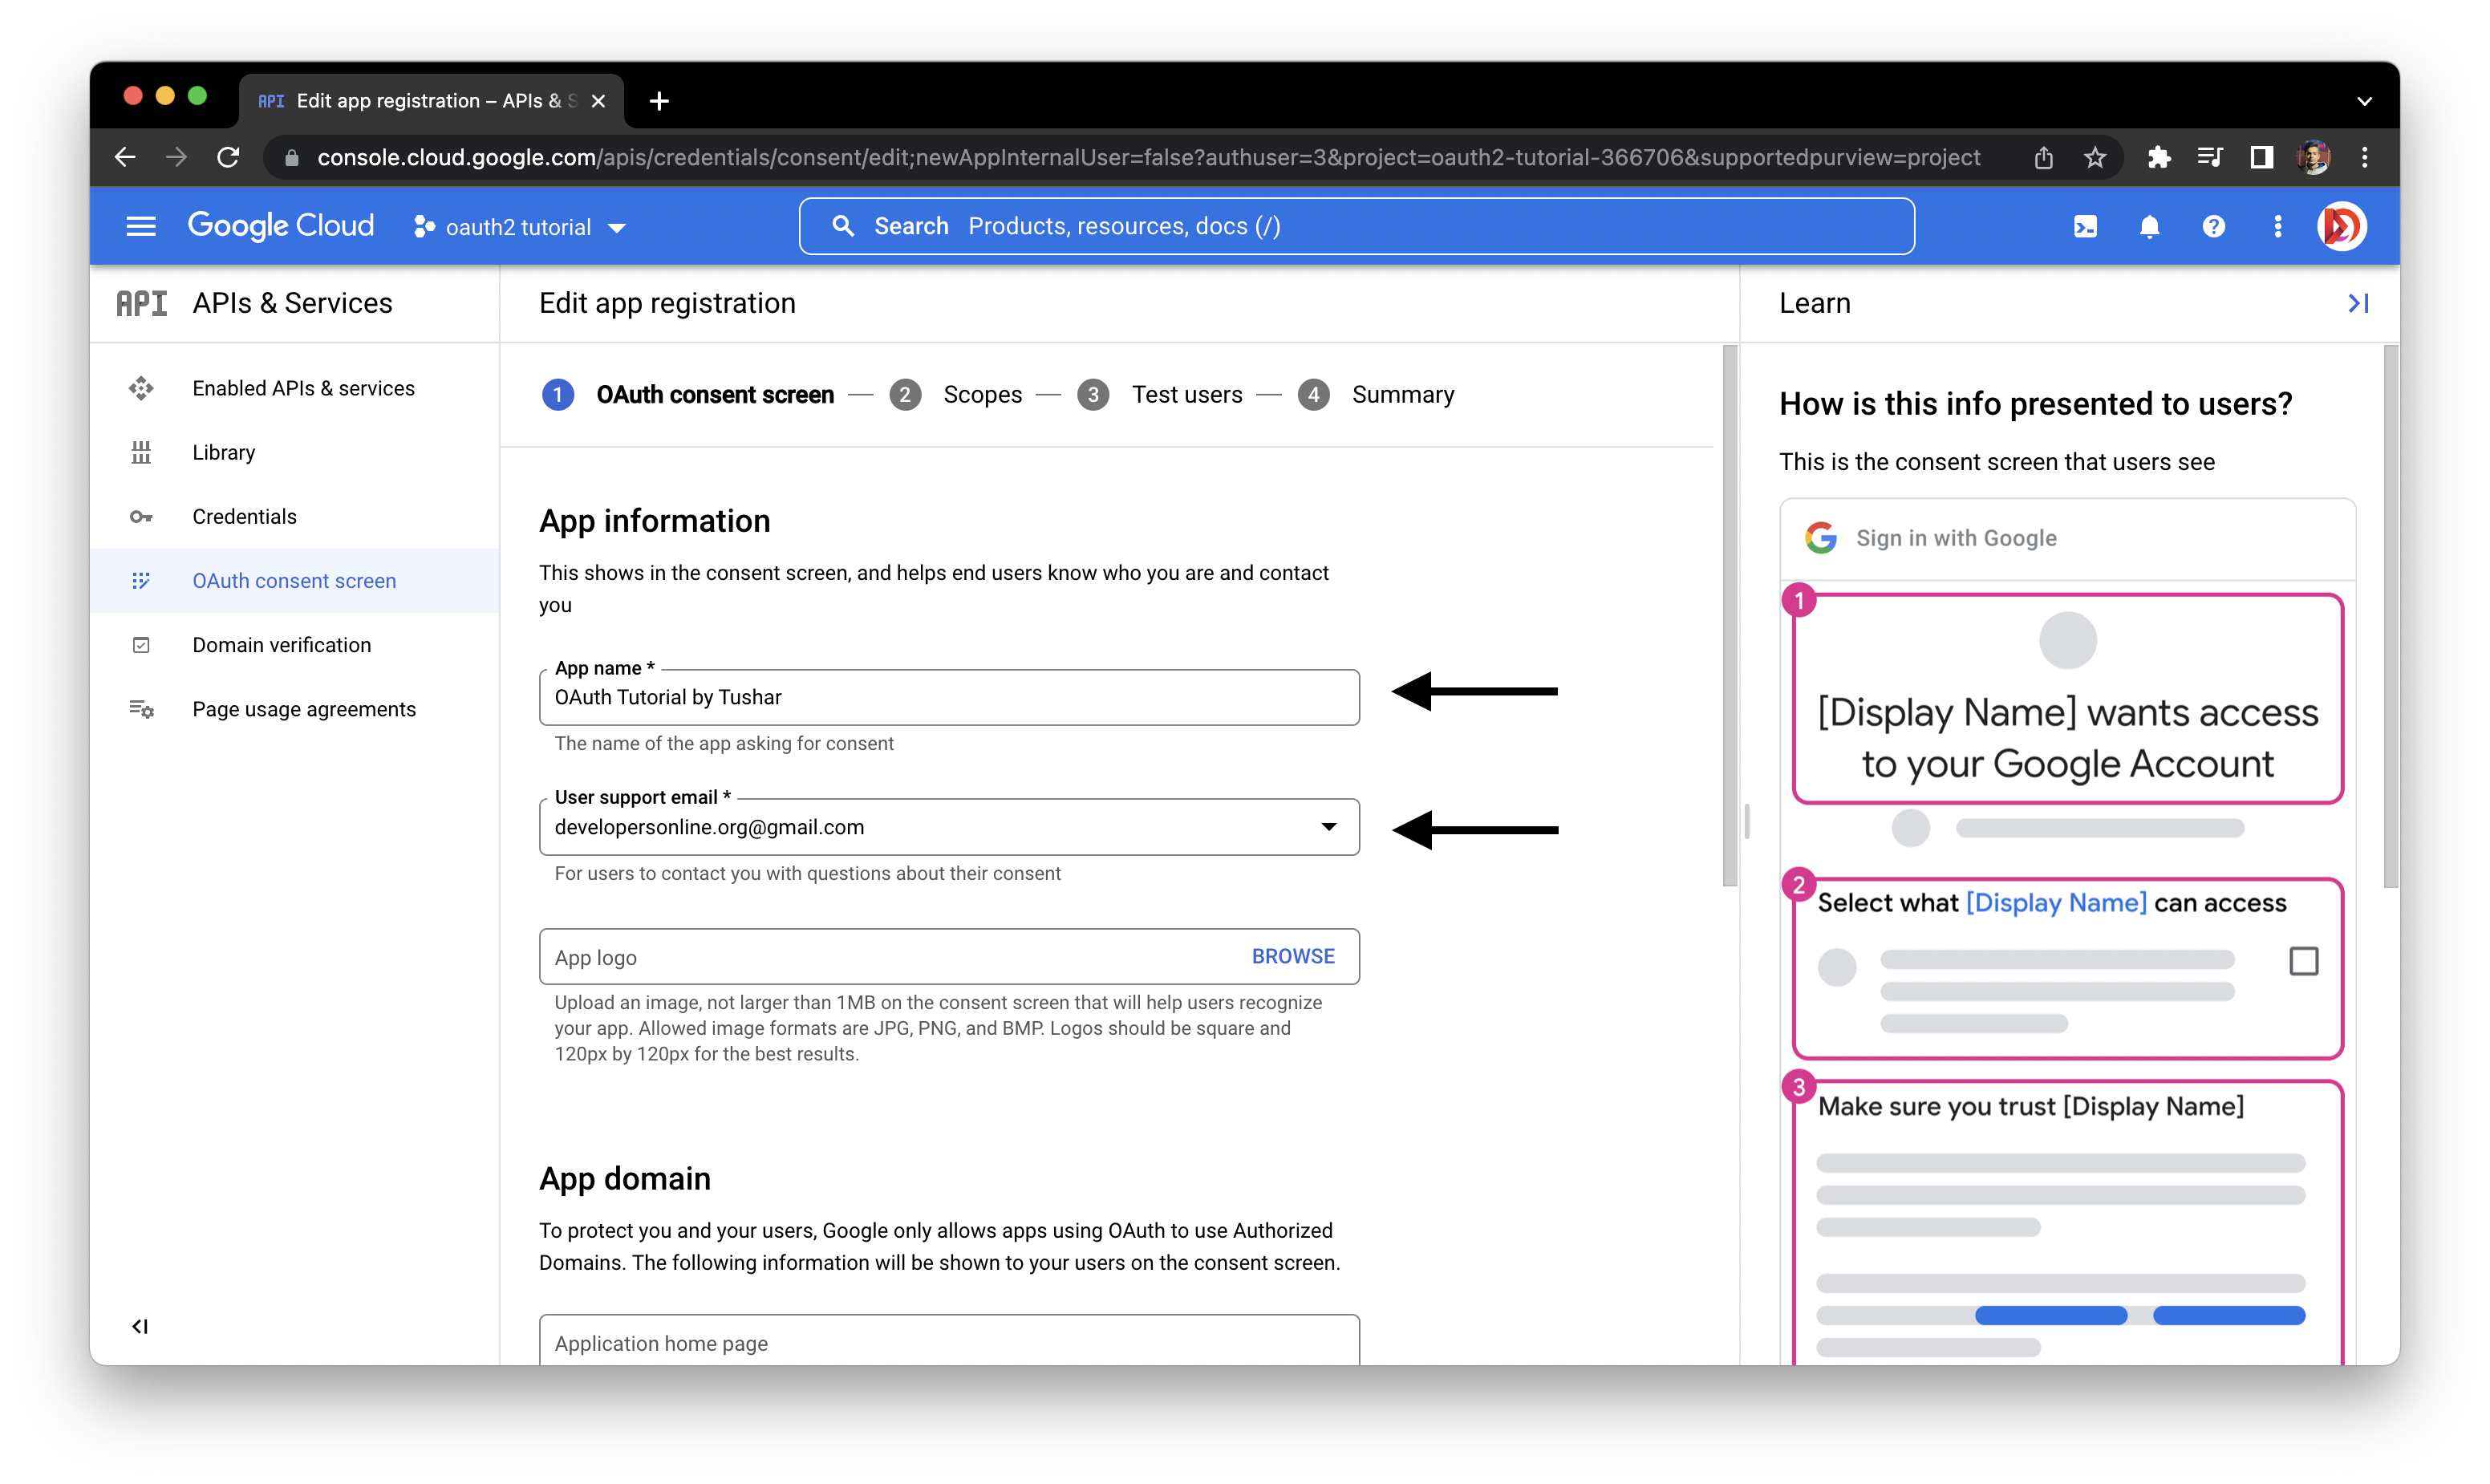
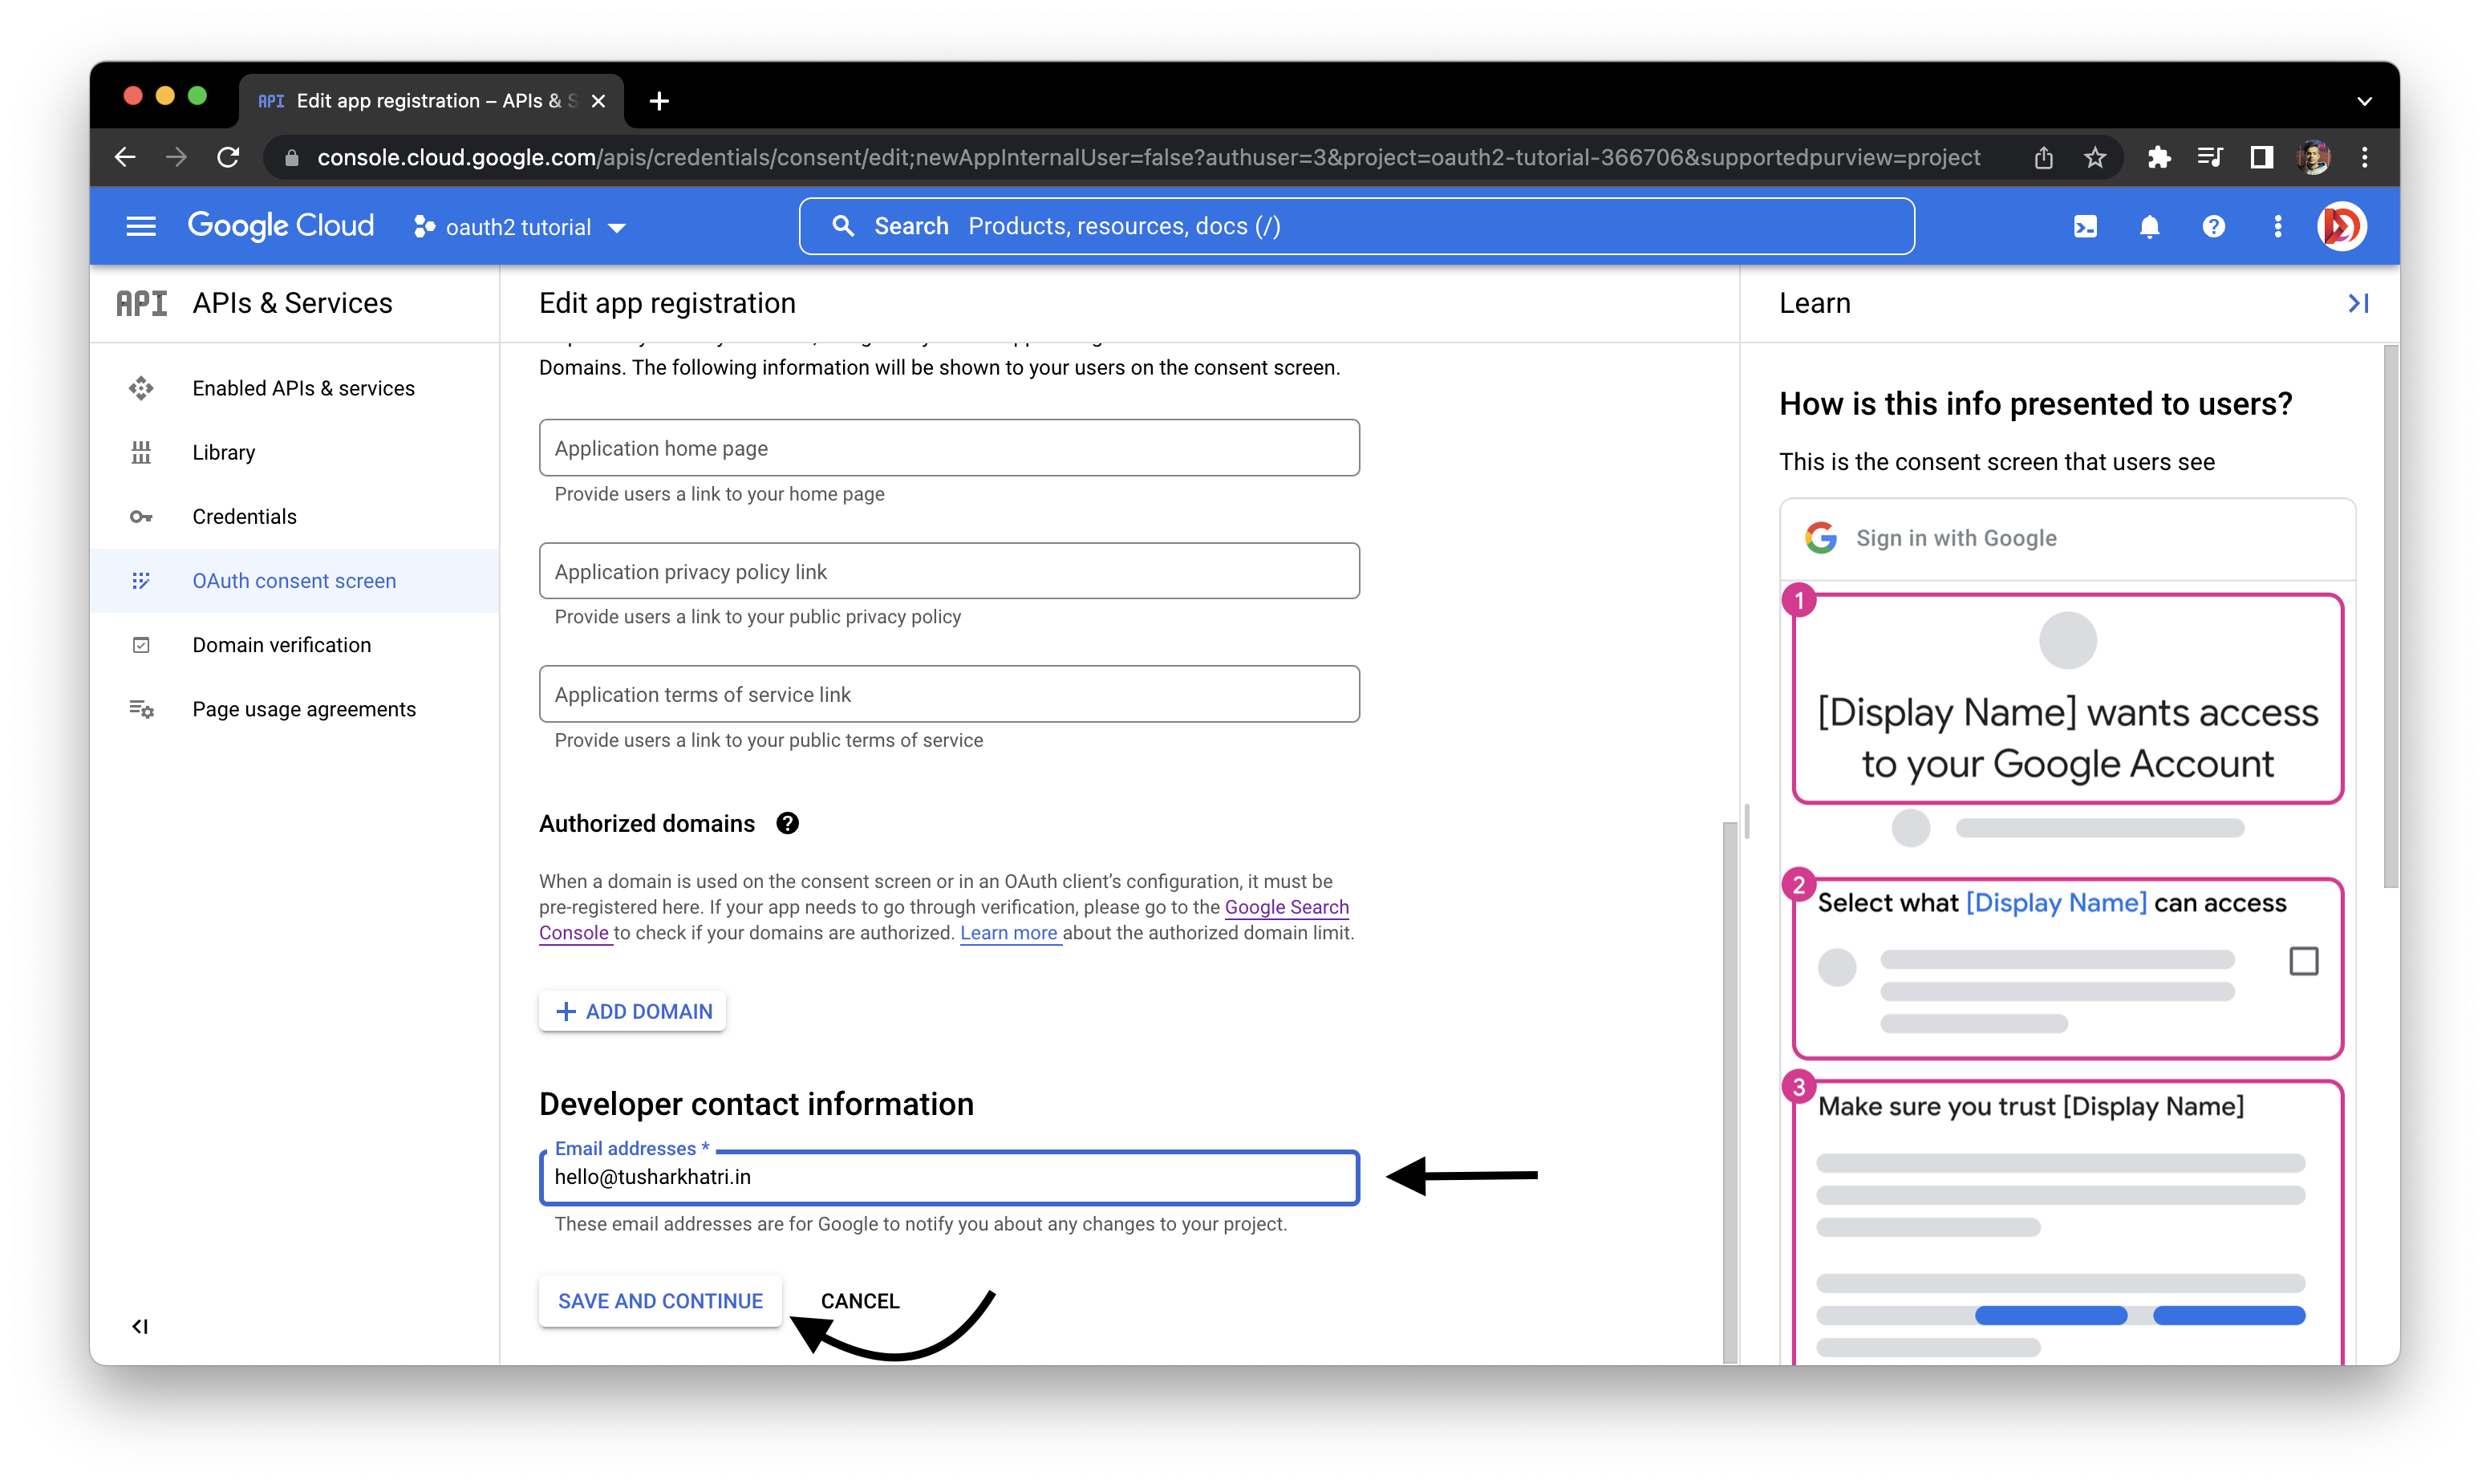
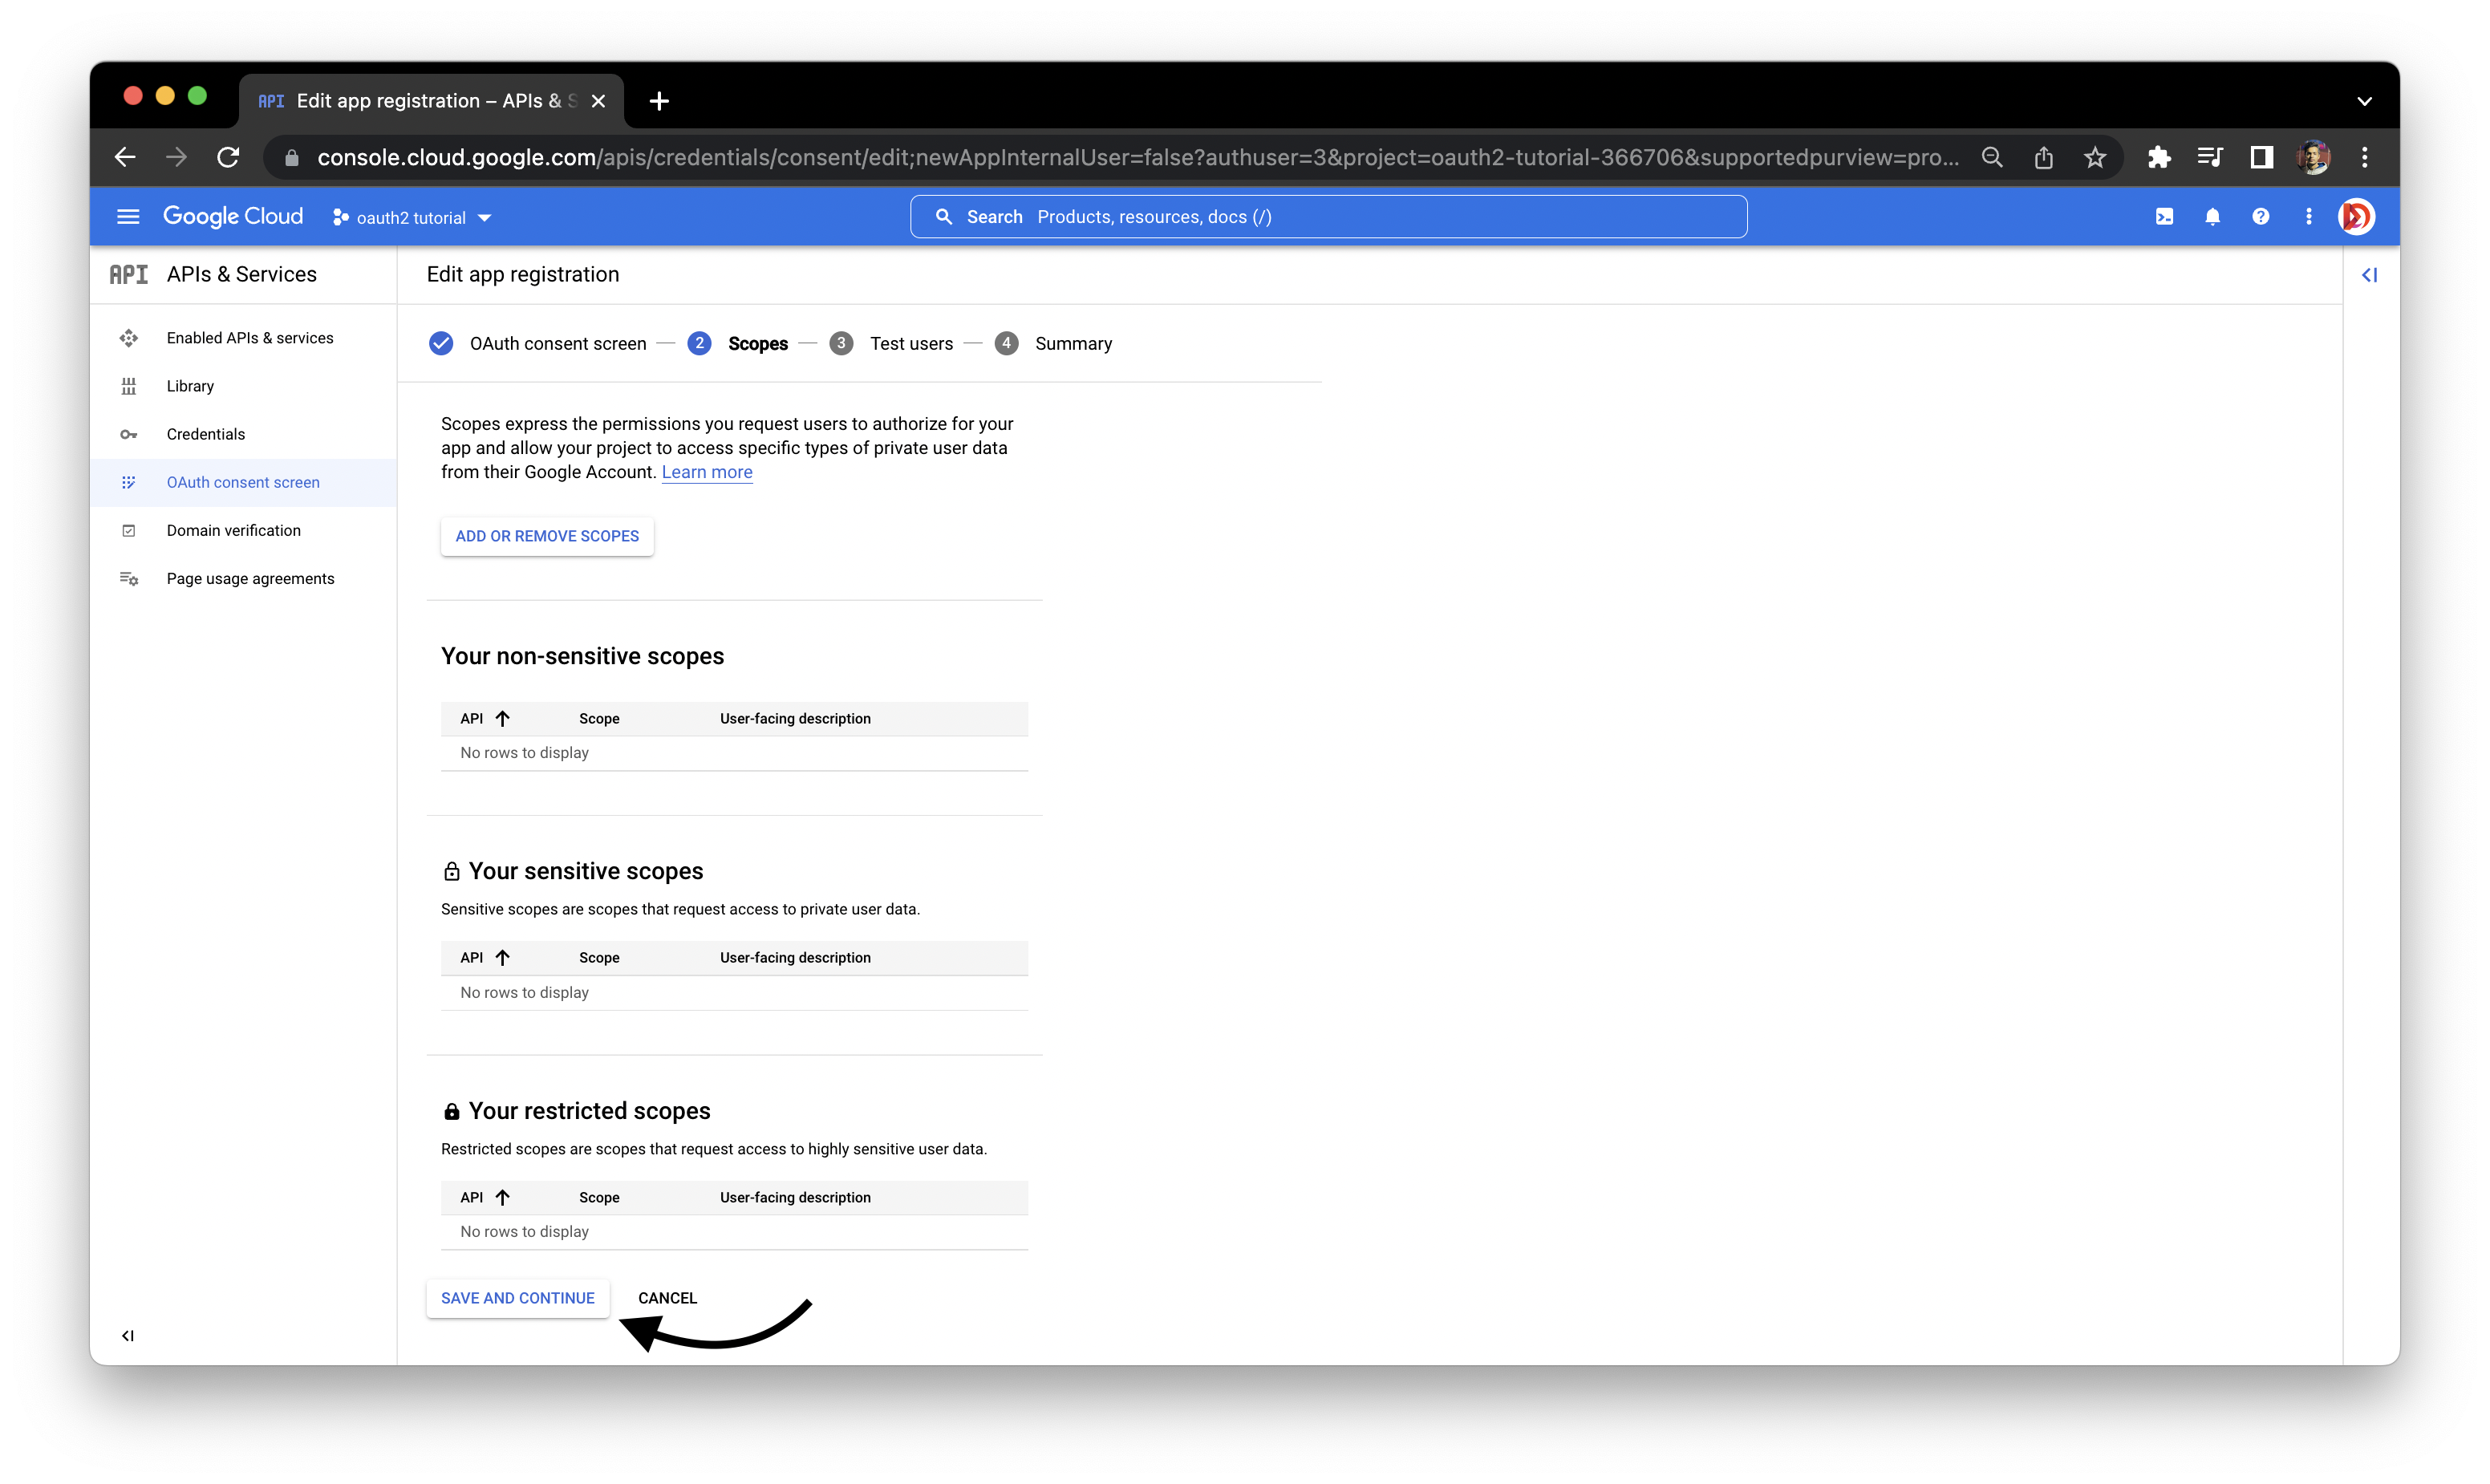
- Make no changes to the Scopes, click SAVE AND CONTINUE.
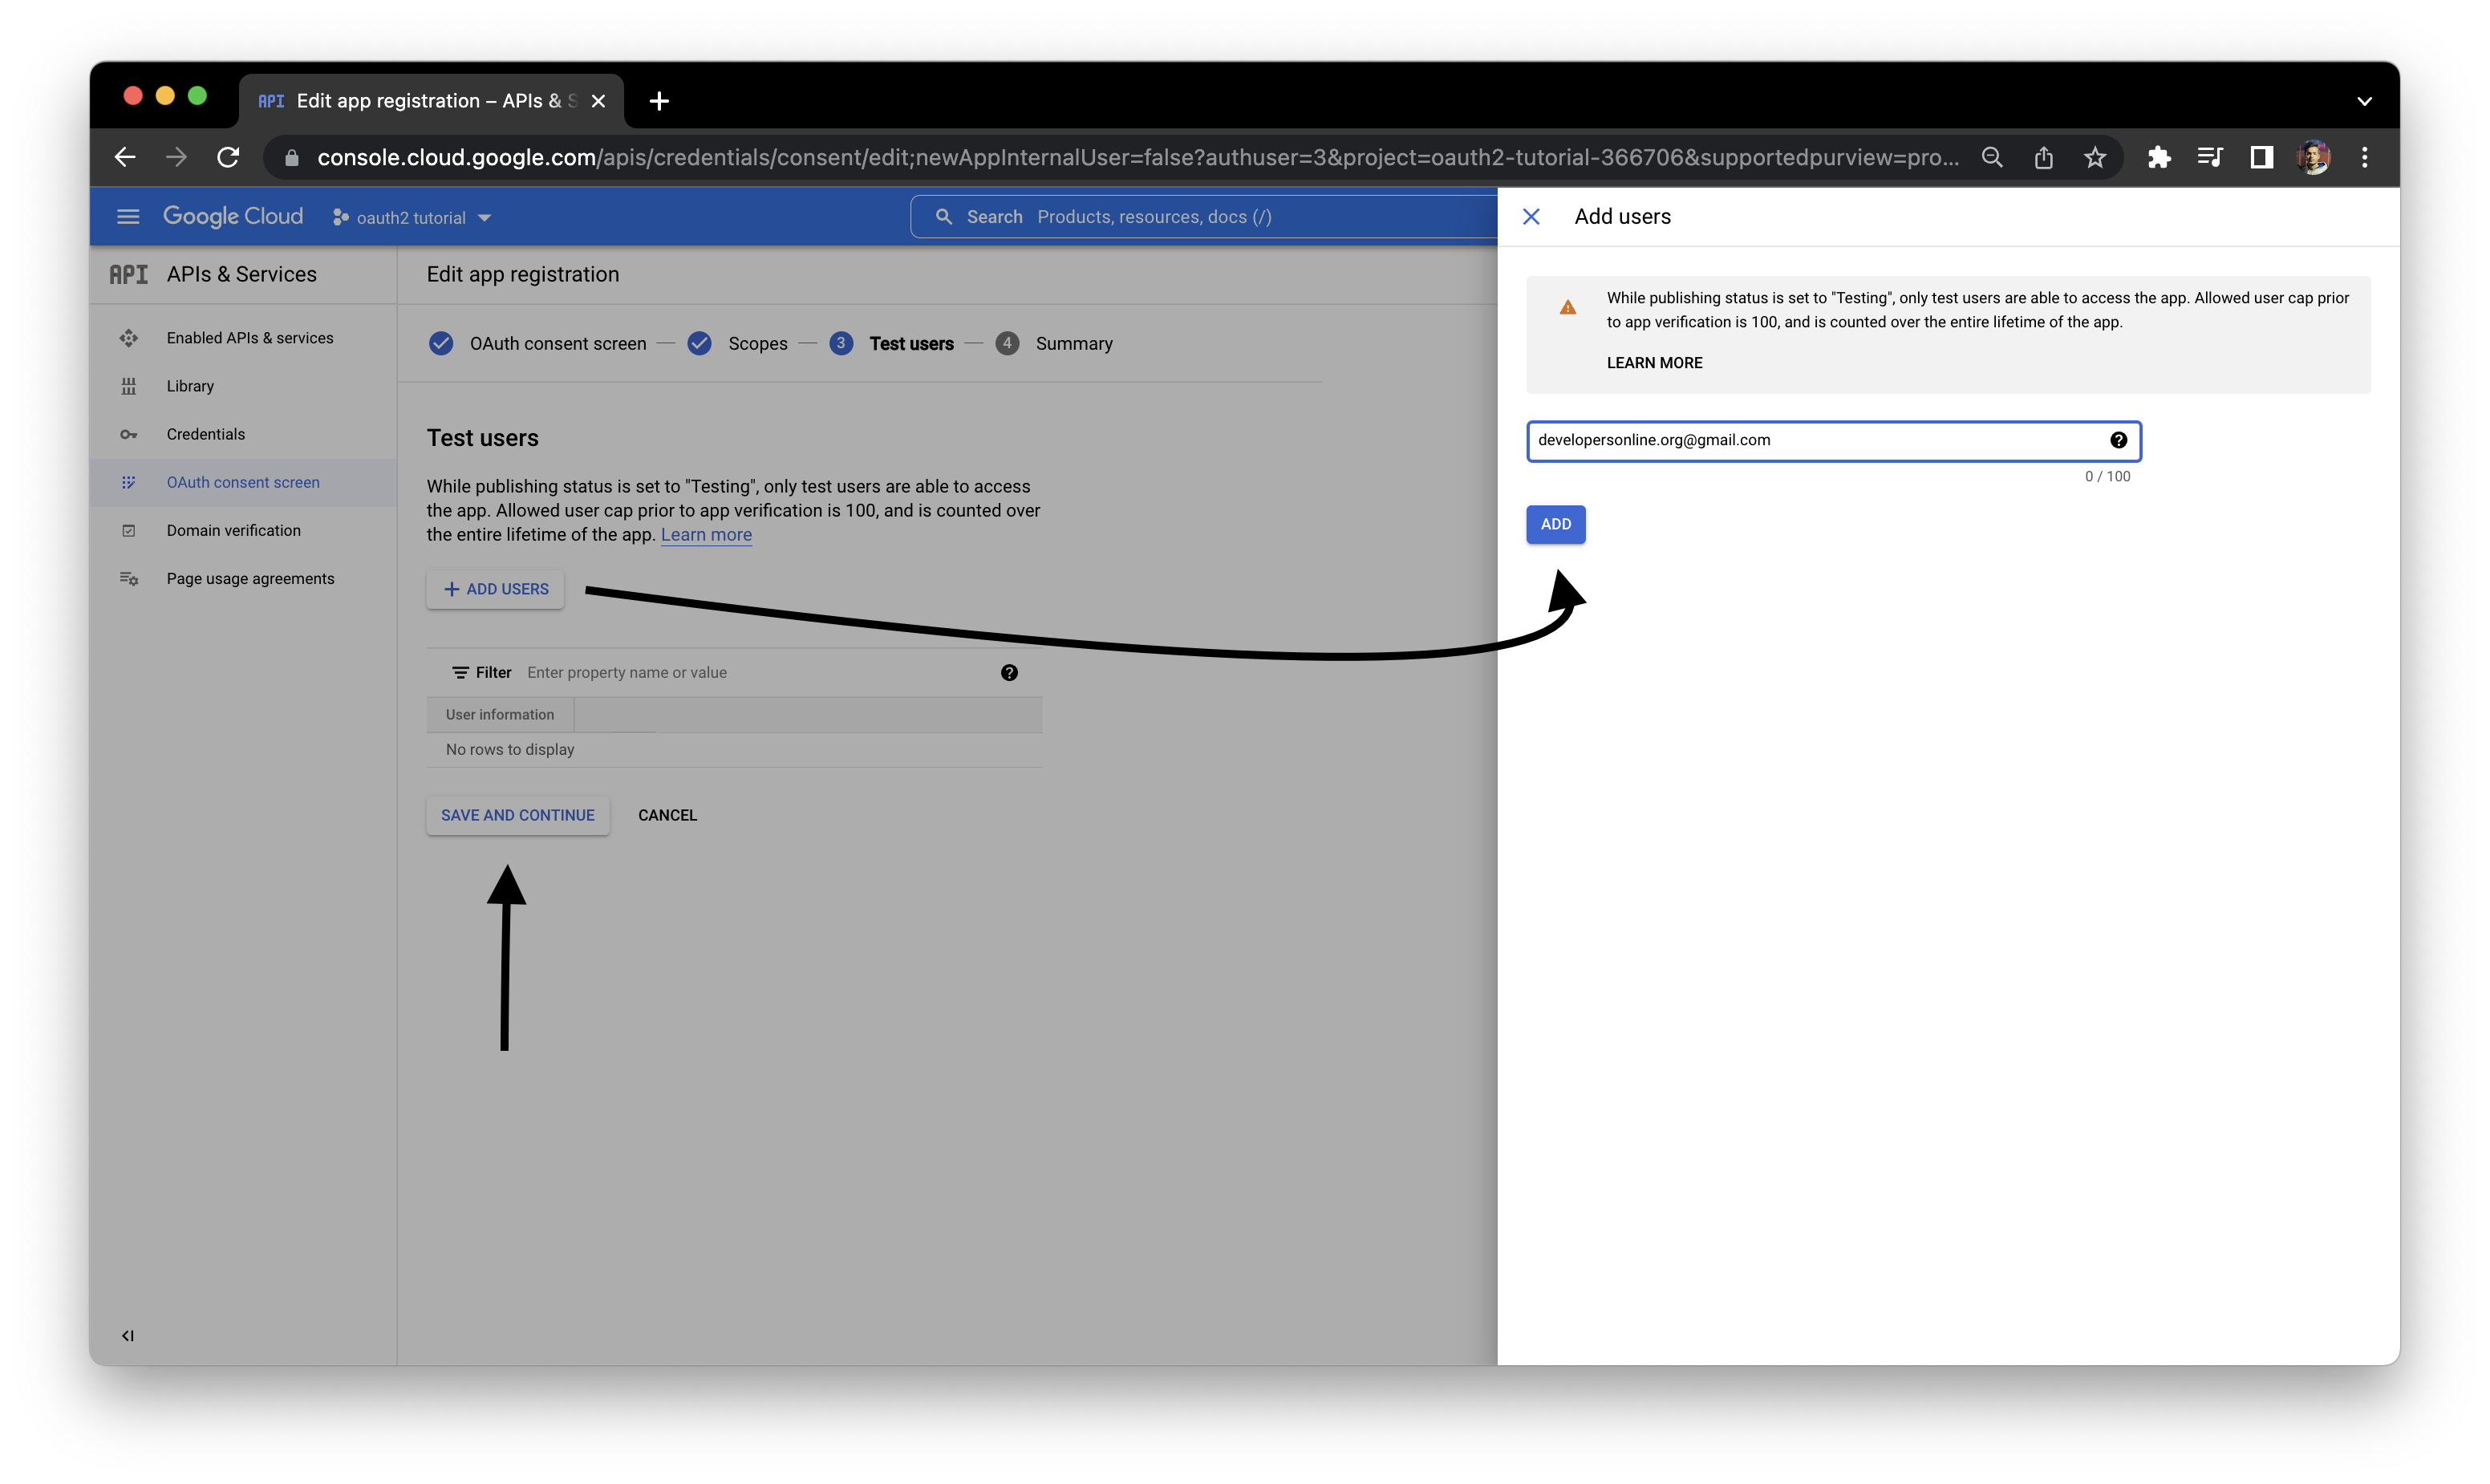
- Enter the email address you want to send automatic emails from.
- Check the Summary and click BACK TO DASHBOARD.
Create Credentials.
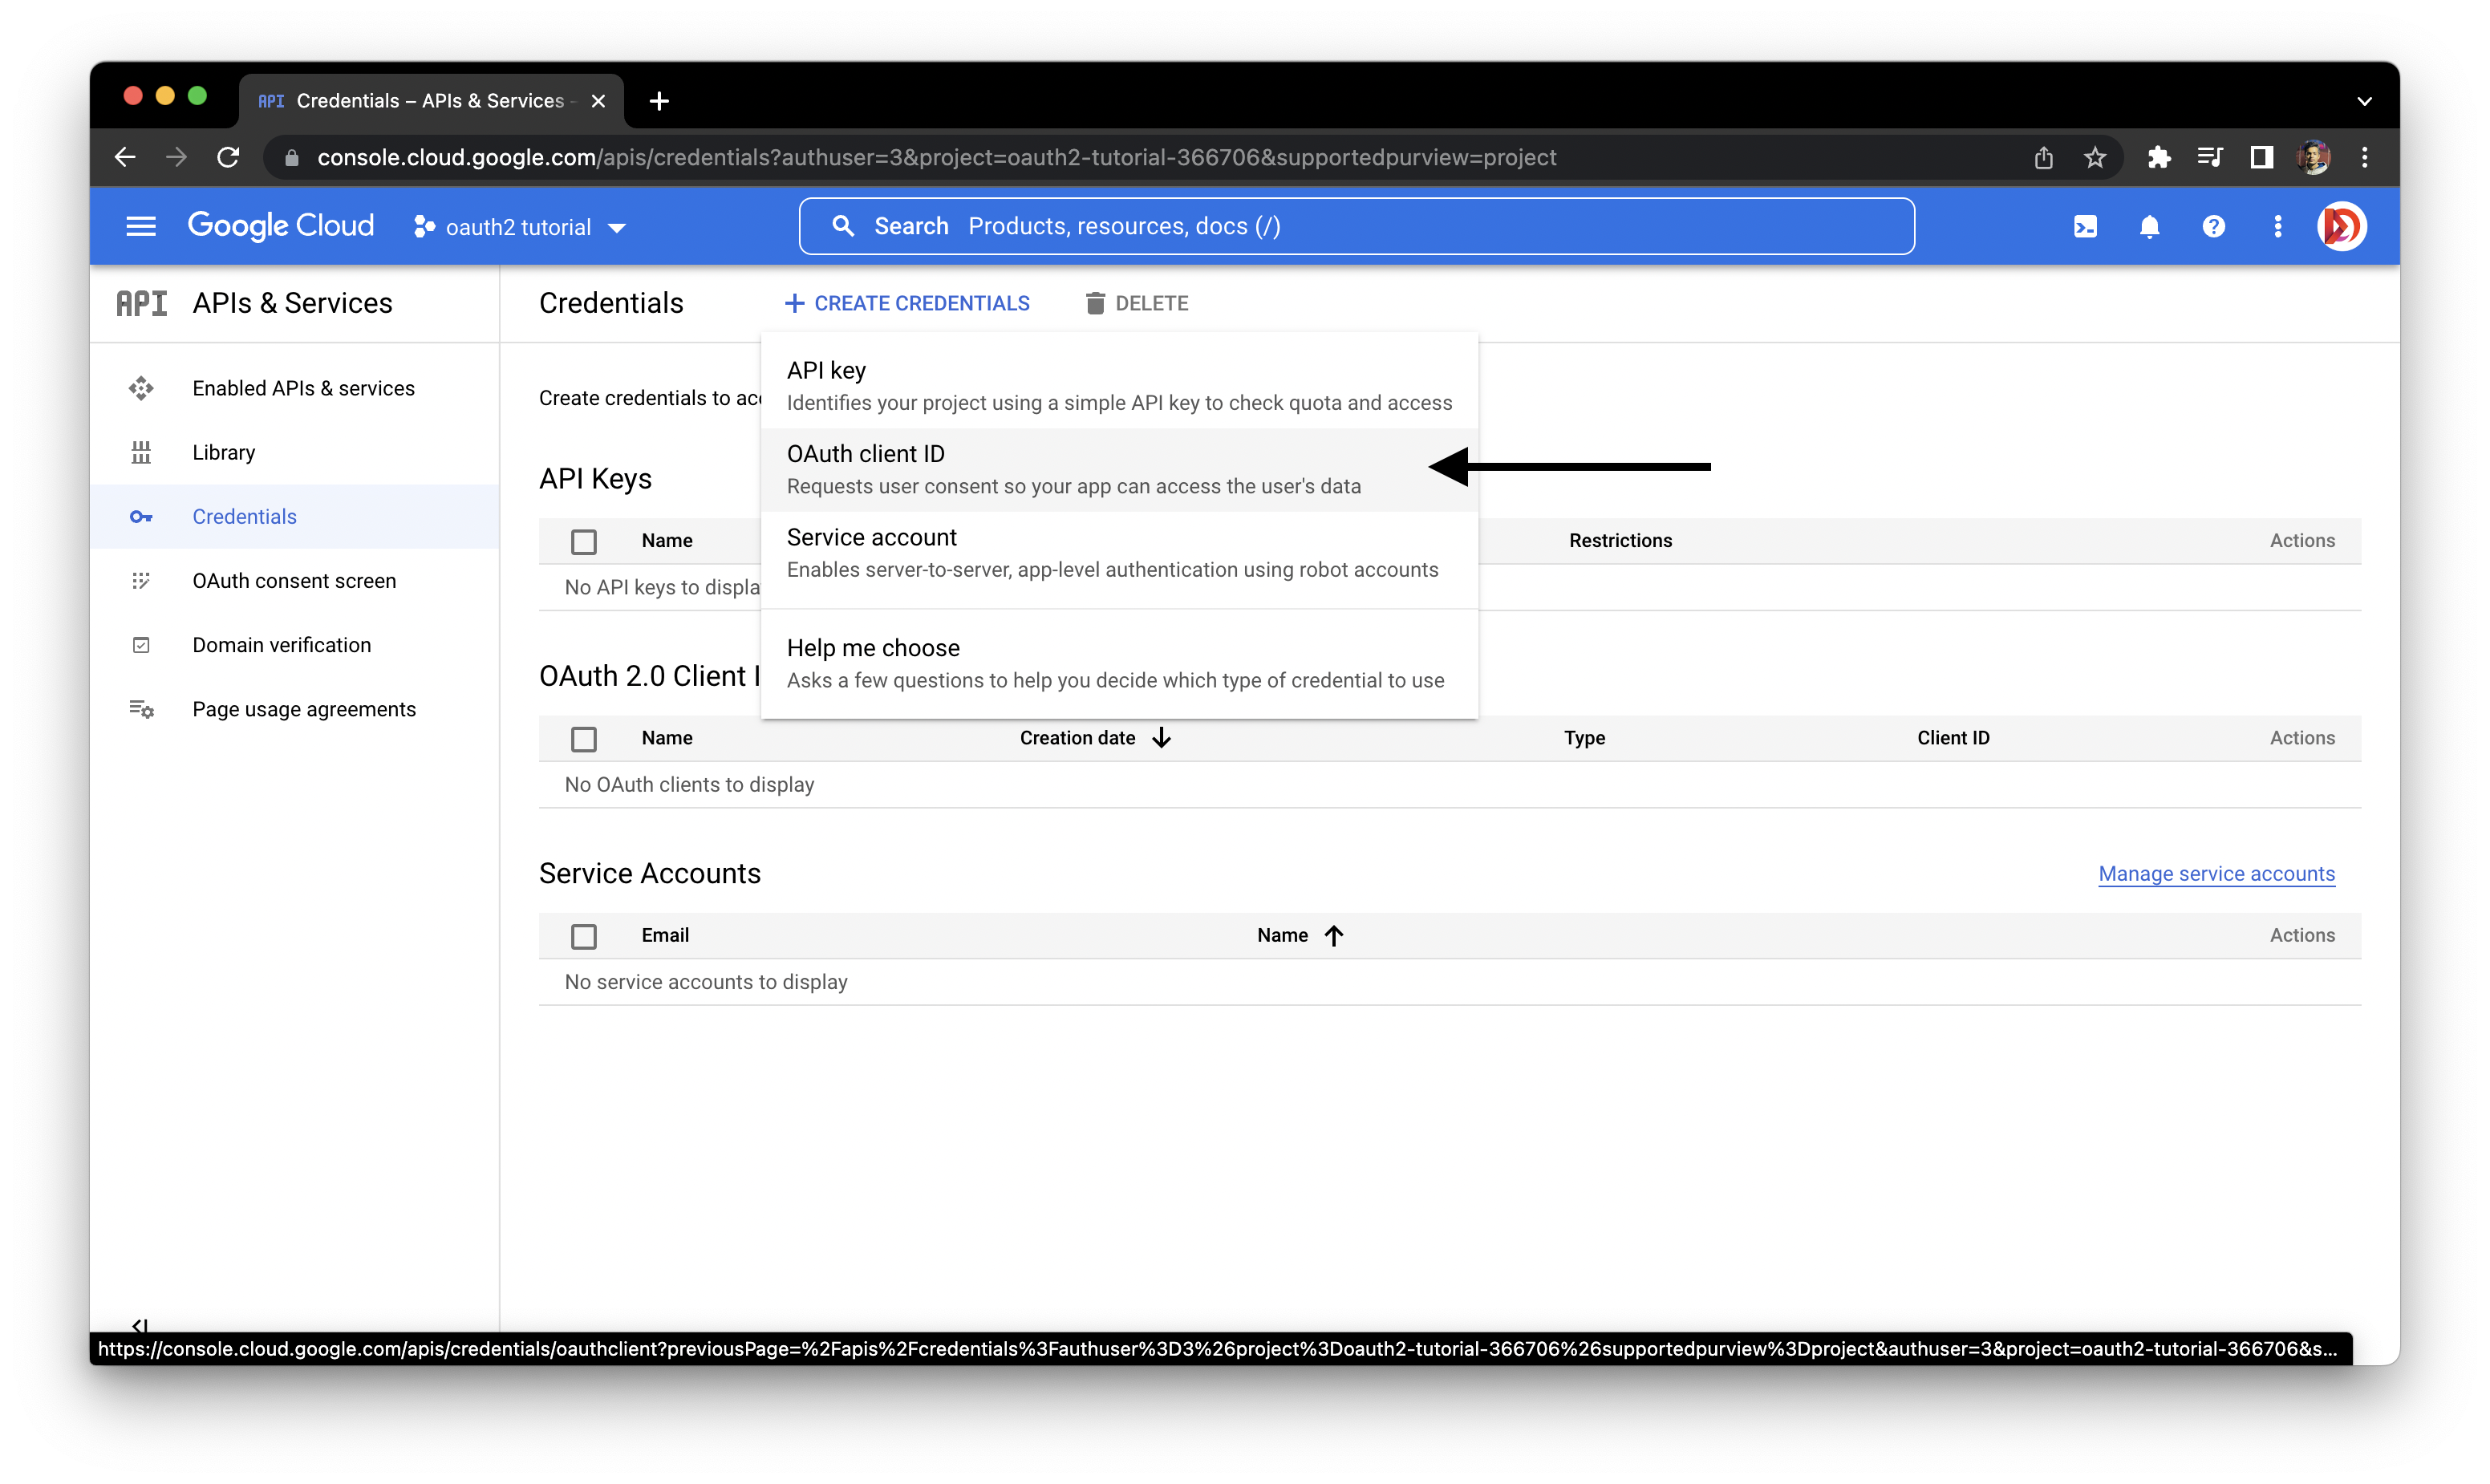
- Navigate to the
Credentialstab on the sidebar and click on+ CREATE CREDENTIALSandOAuth client ID.
- Fill all the mandatory fields and set
Authorized redirect URIstohttps://developers.google.com/oauthplayground.
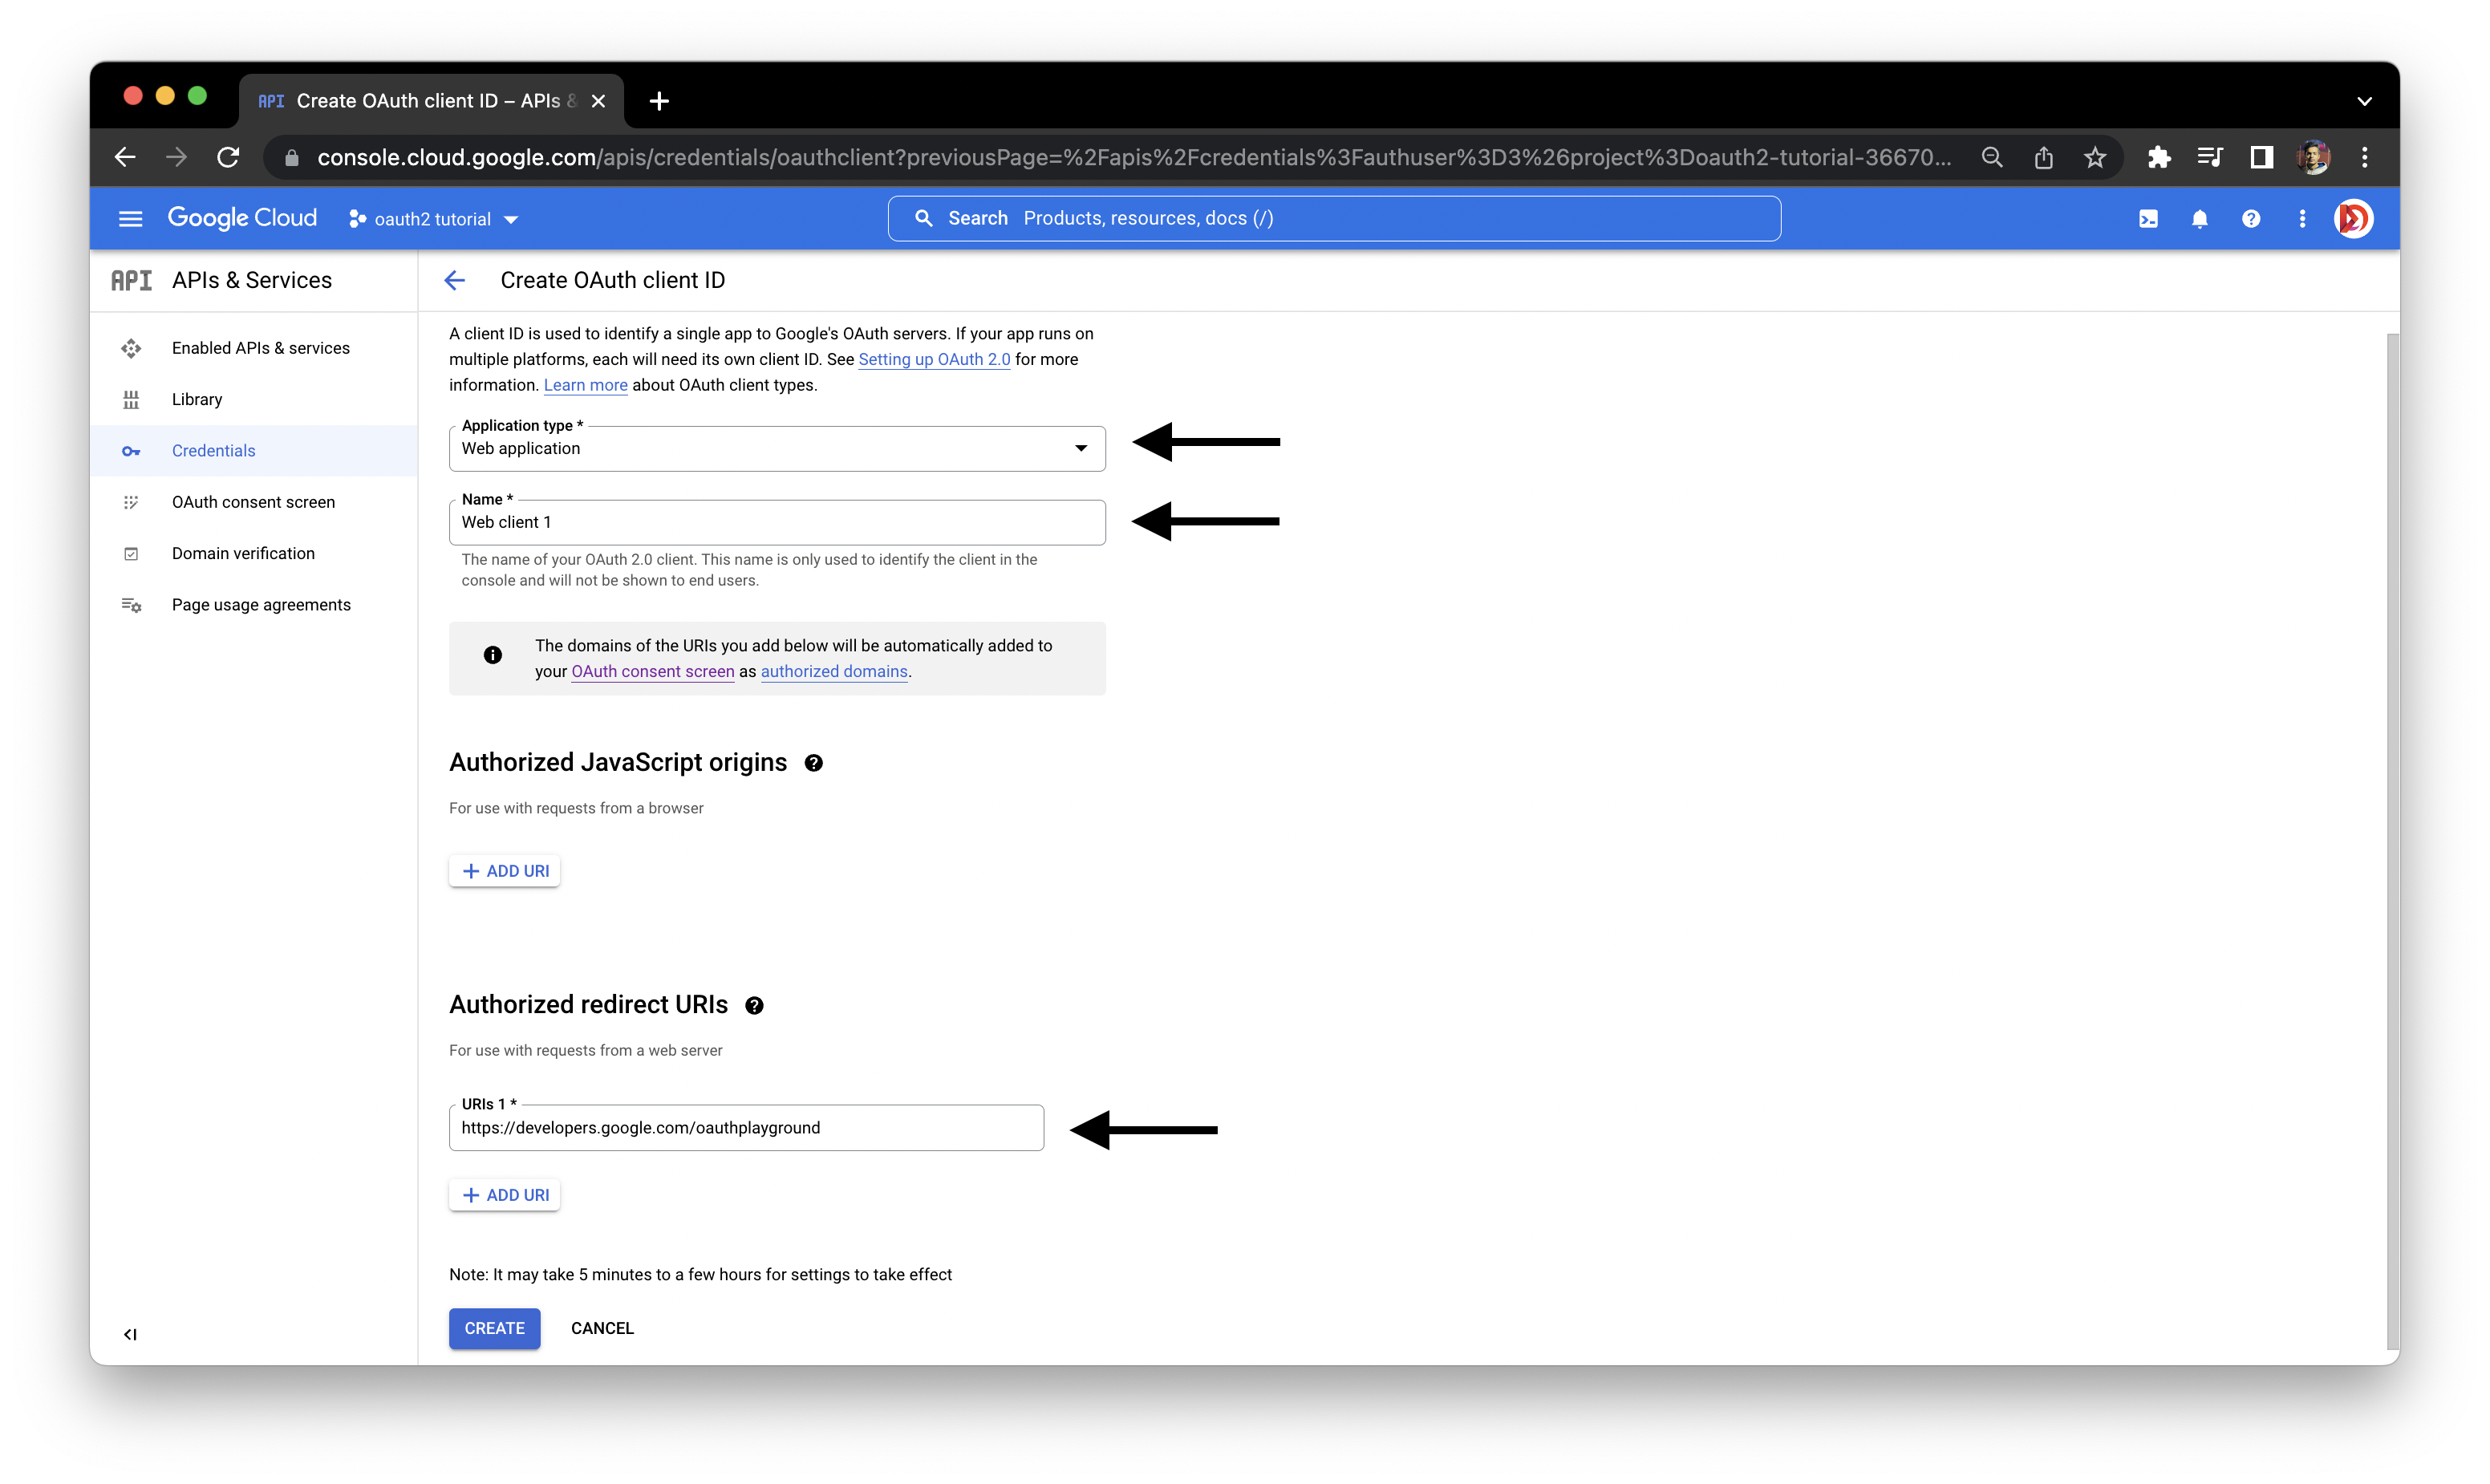
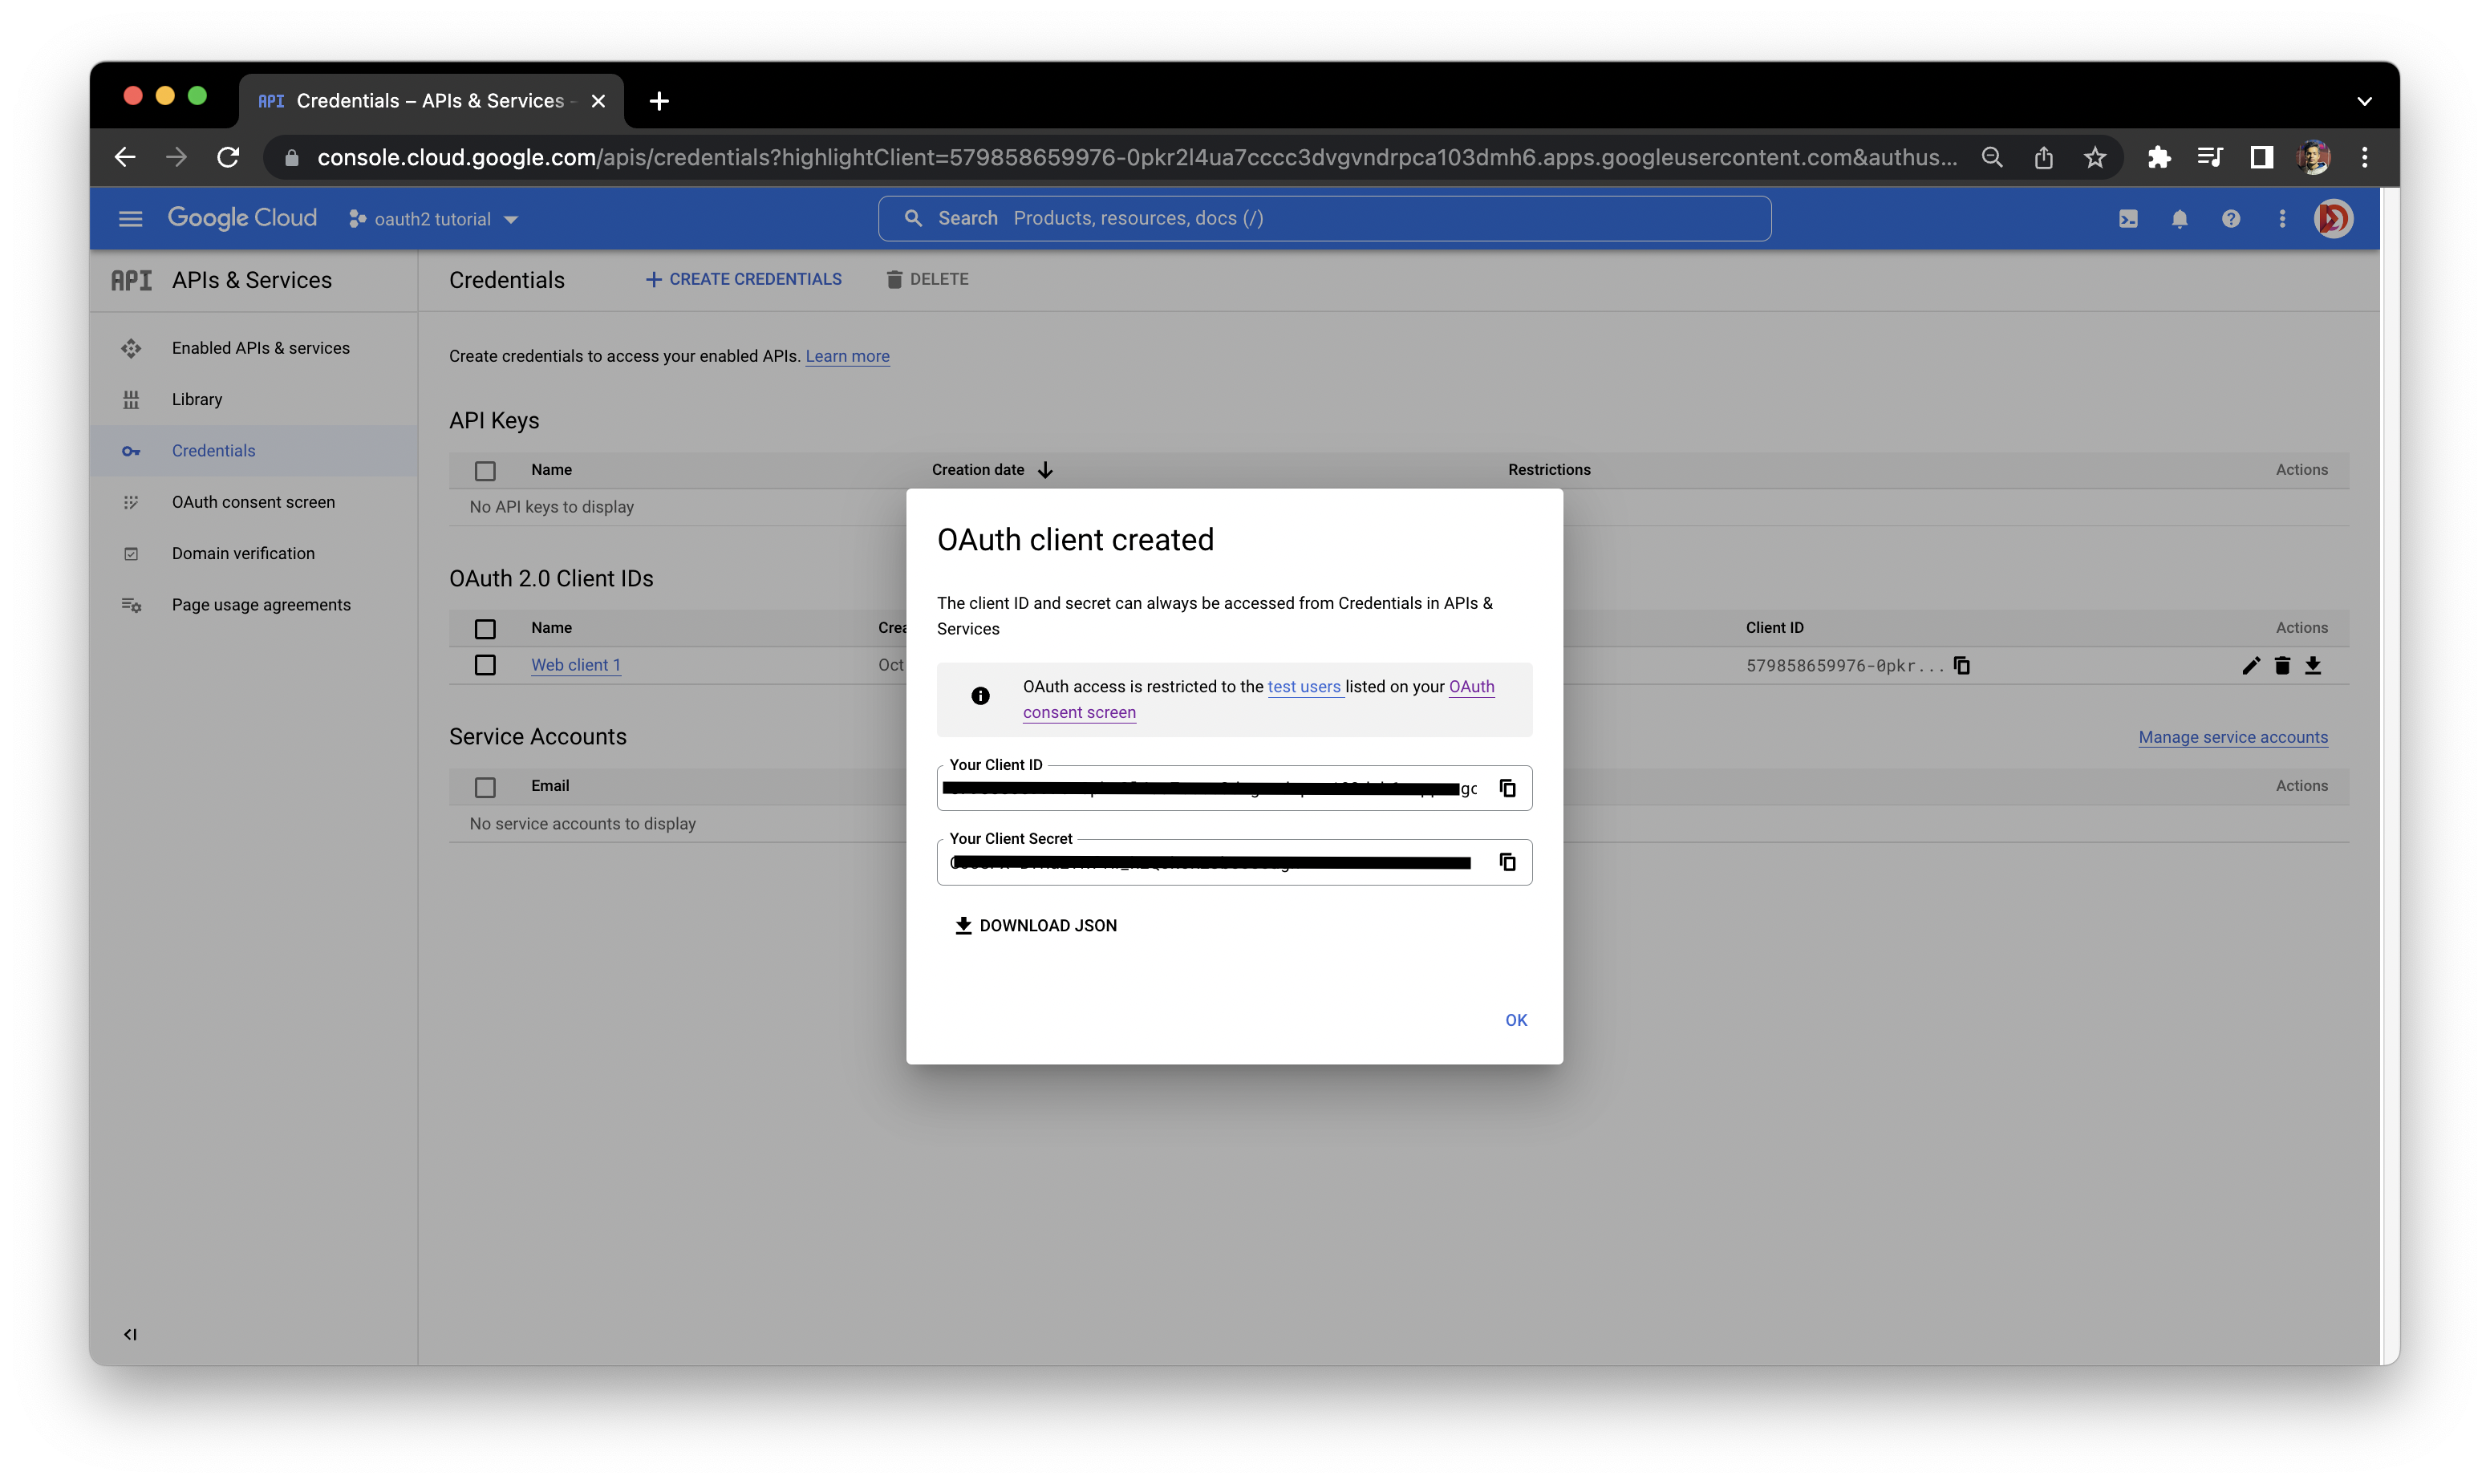
- Copy your
Client IdandClient Secretto a safe place as we will use them later.
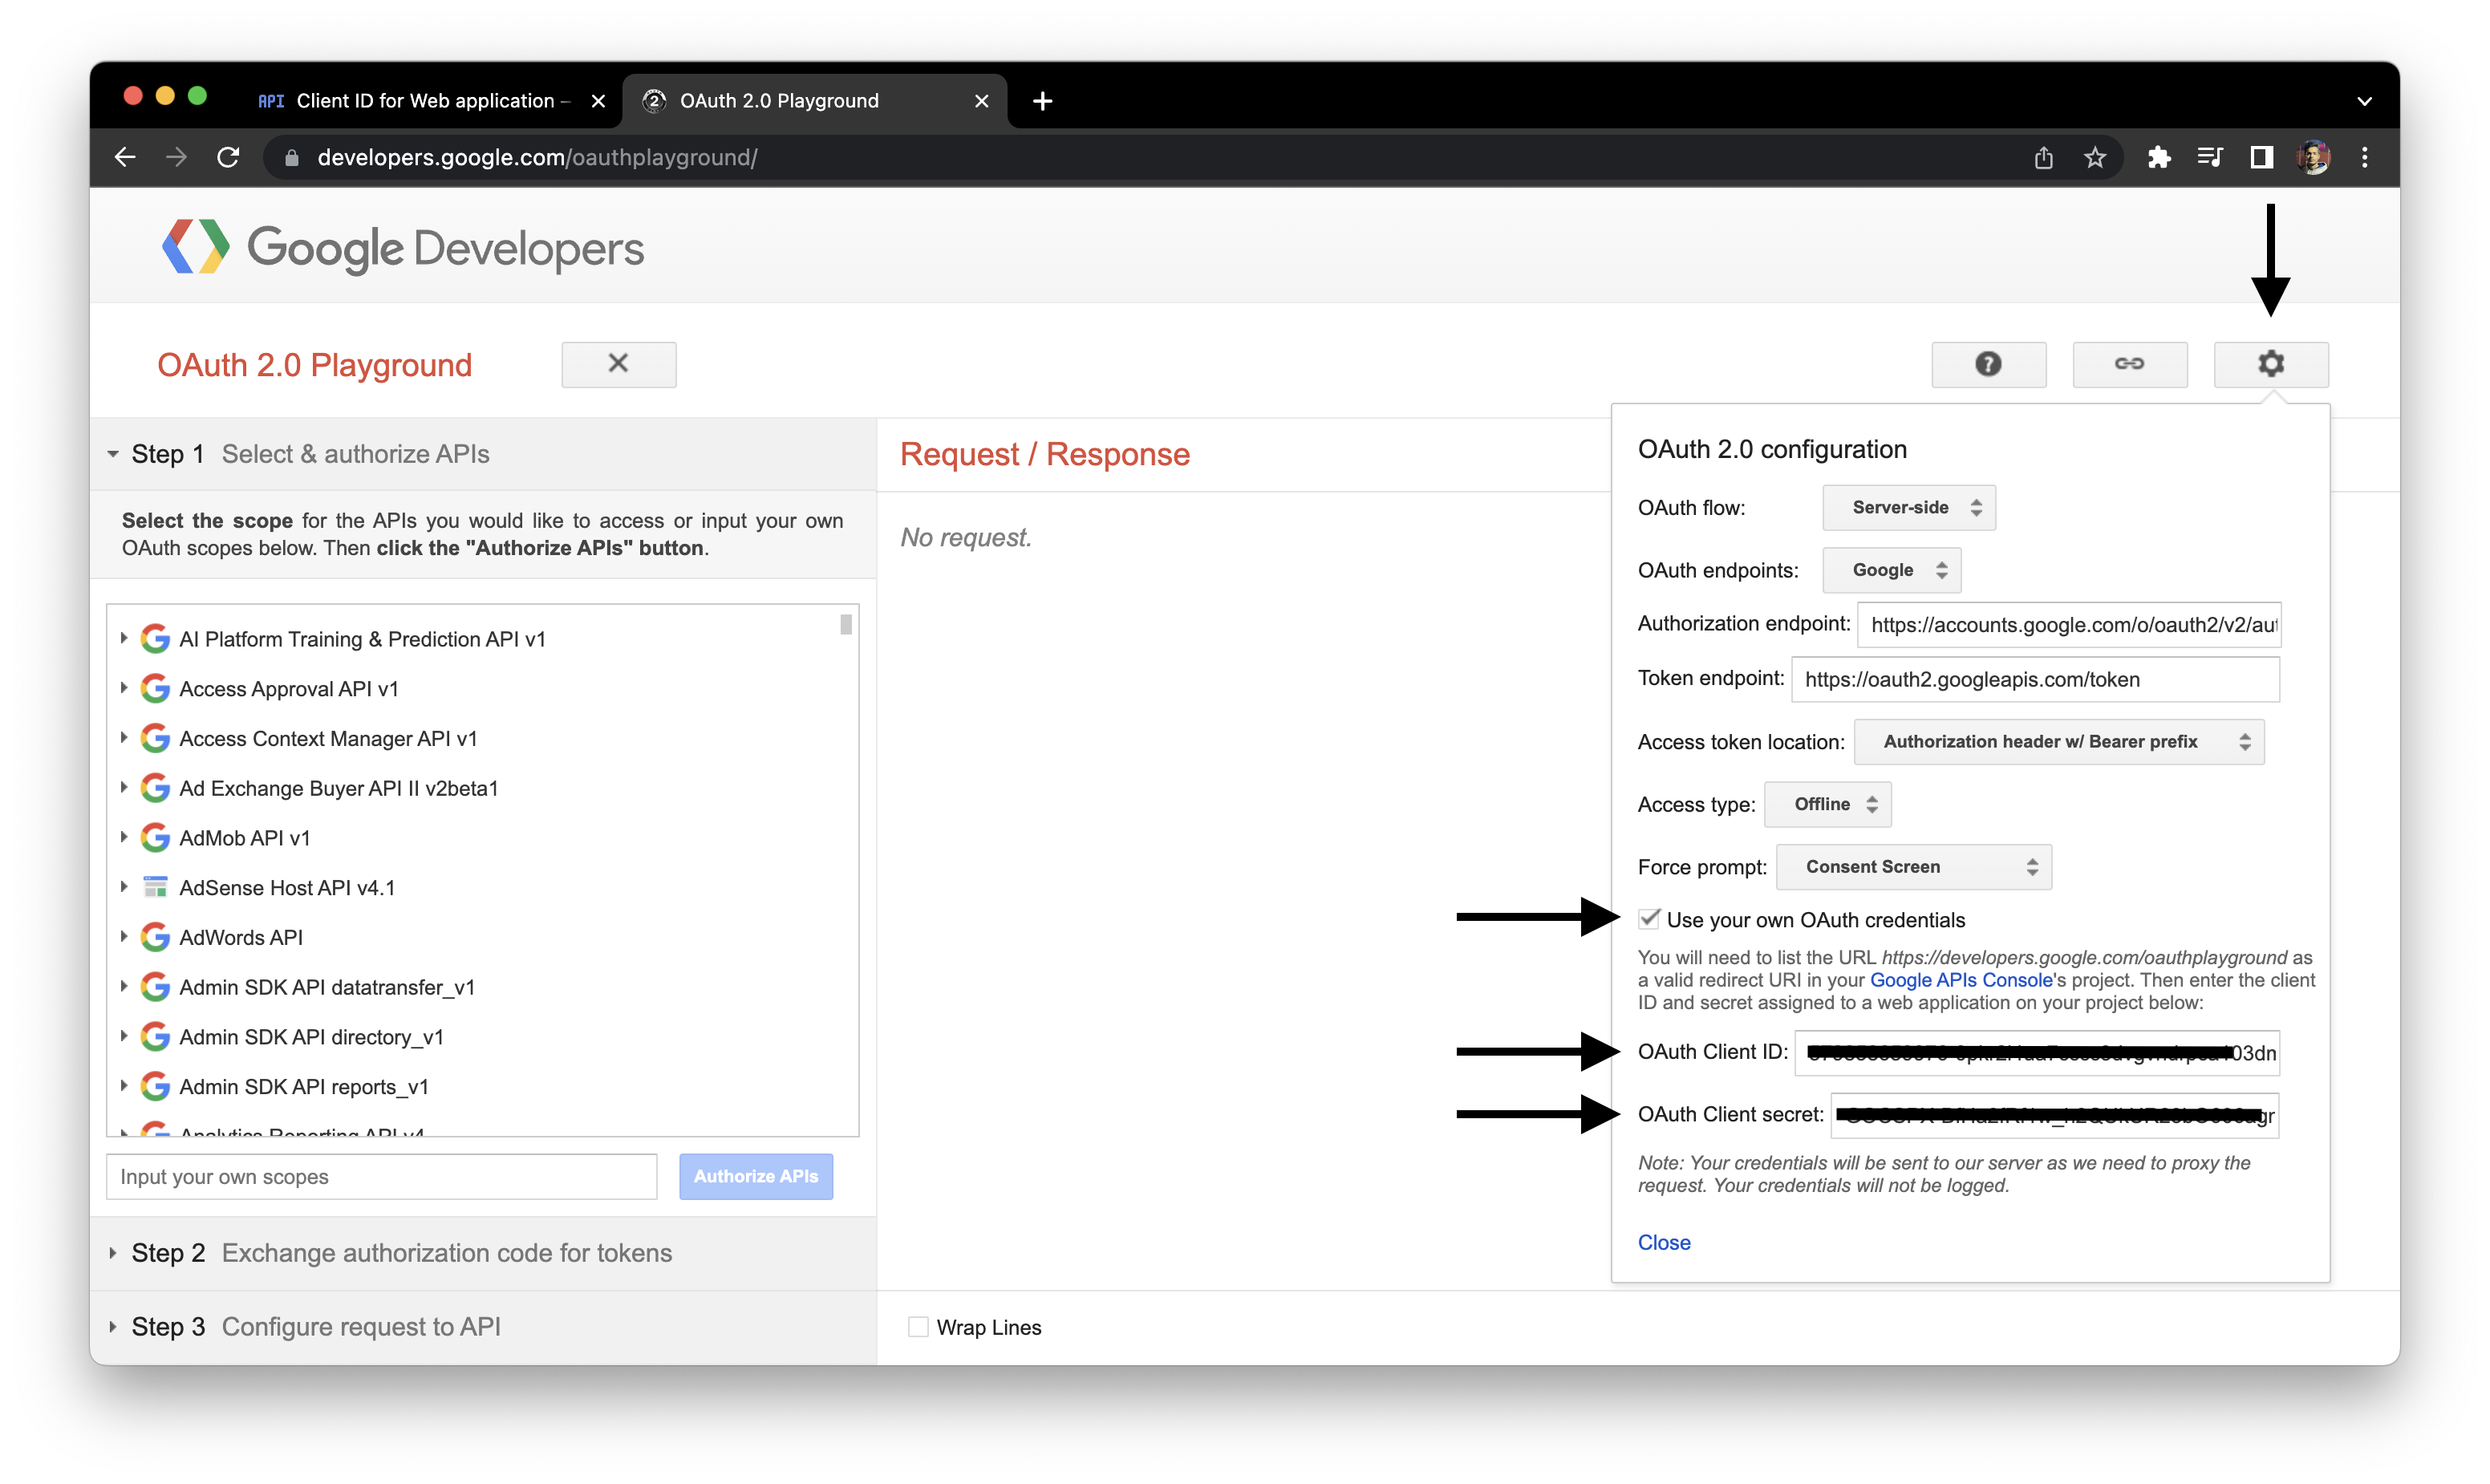
Authorize API
- Head over to
https://developers.google.com/oauthplaygroundand fill in the recently generatedClient IdandClient Secretin theOAuth 2.0 configurationshown below.
- fill in
https://mail.google.comin theAuthorize API's fieldand clickAuthorize API's.
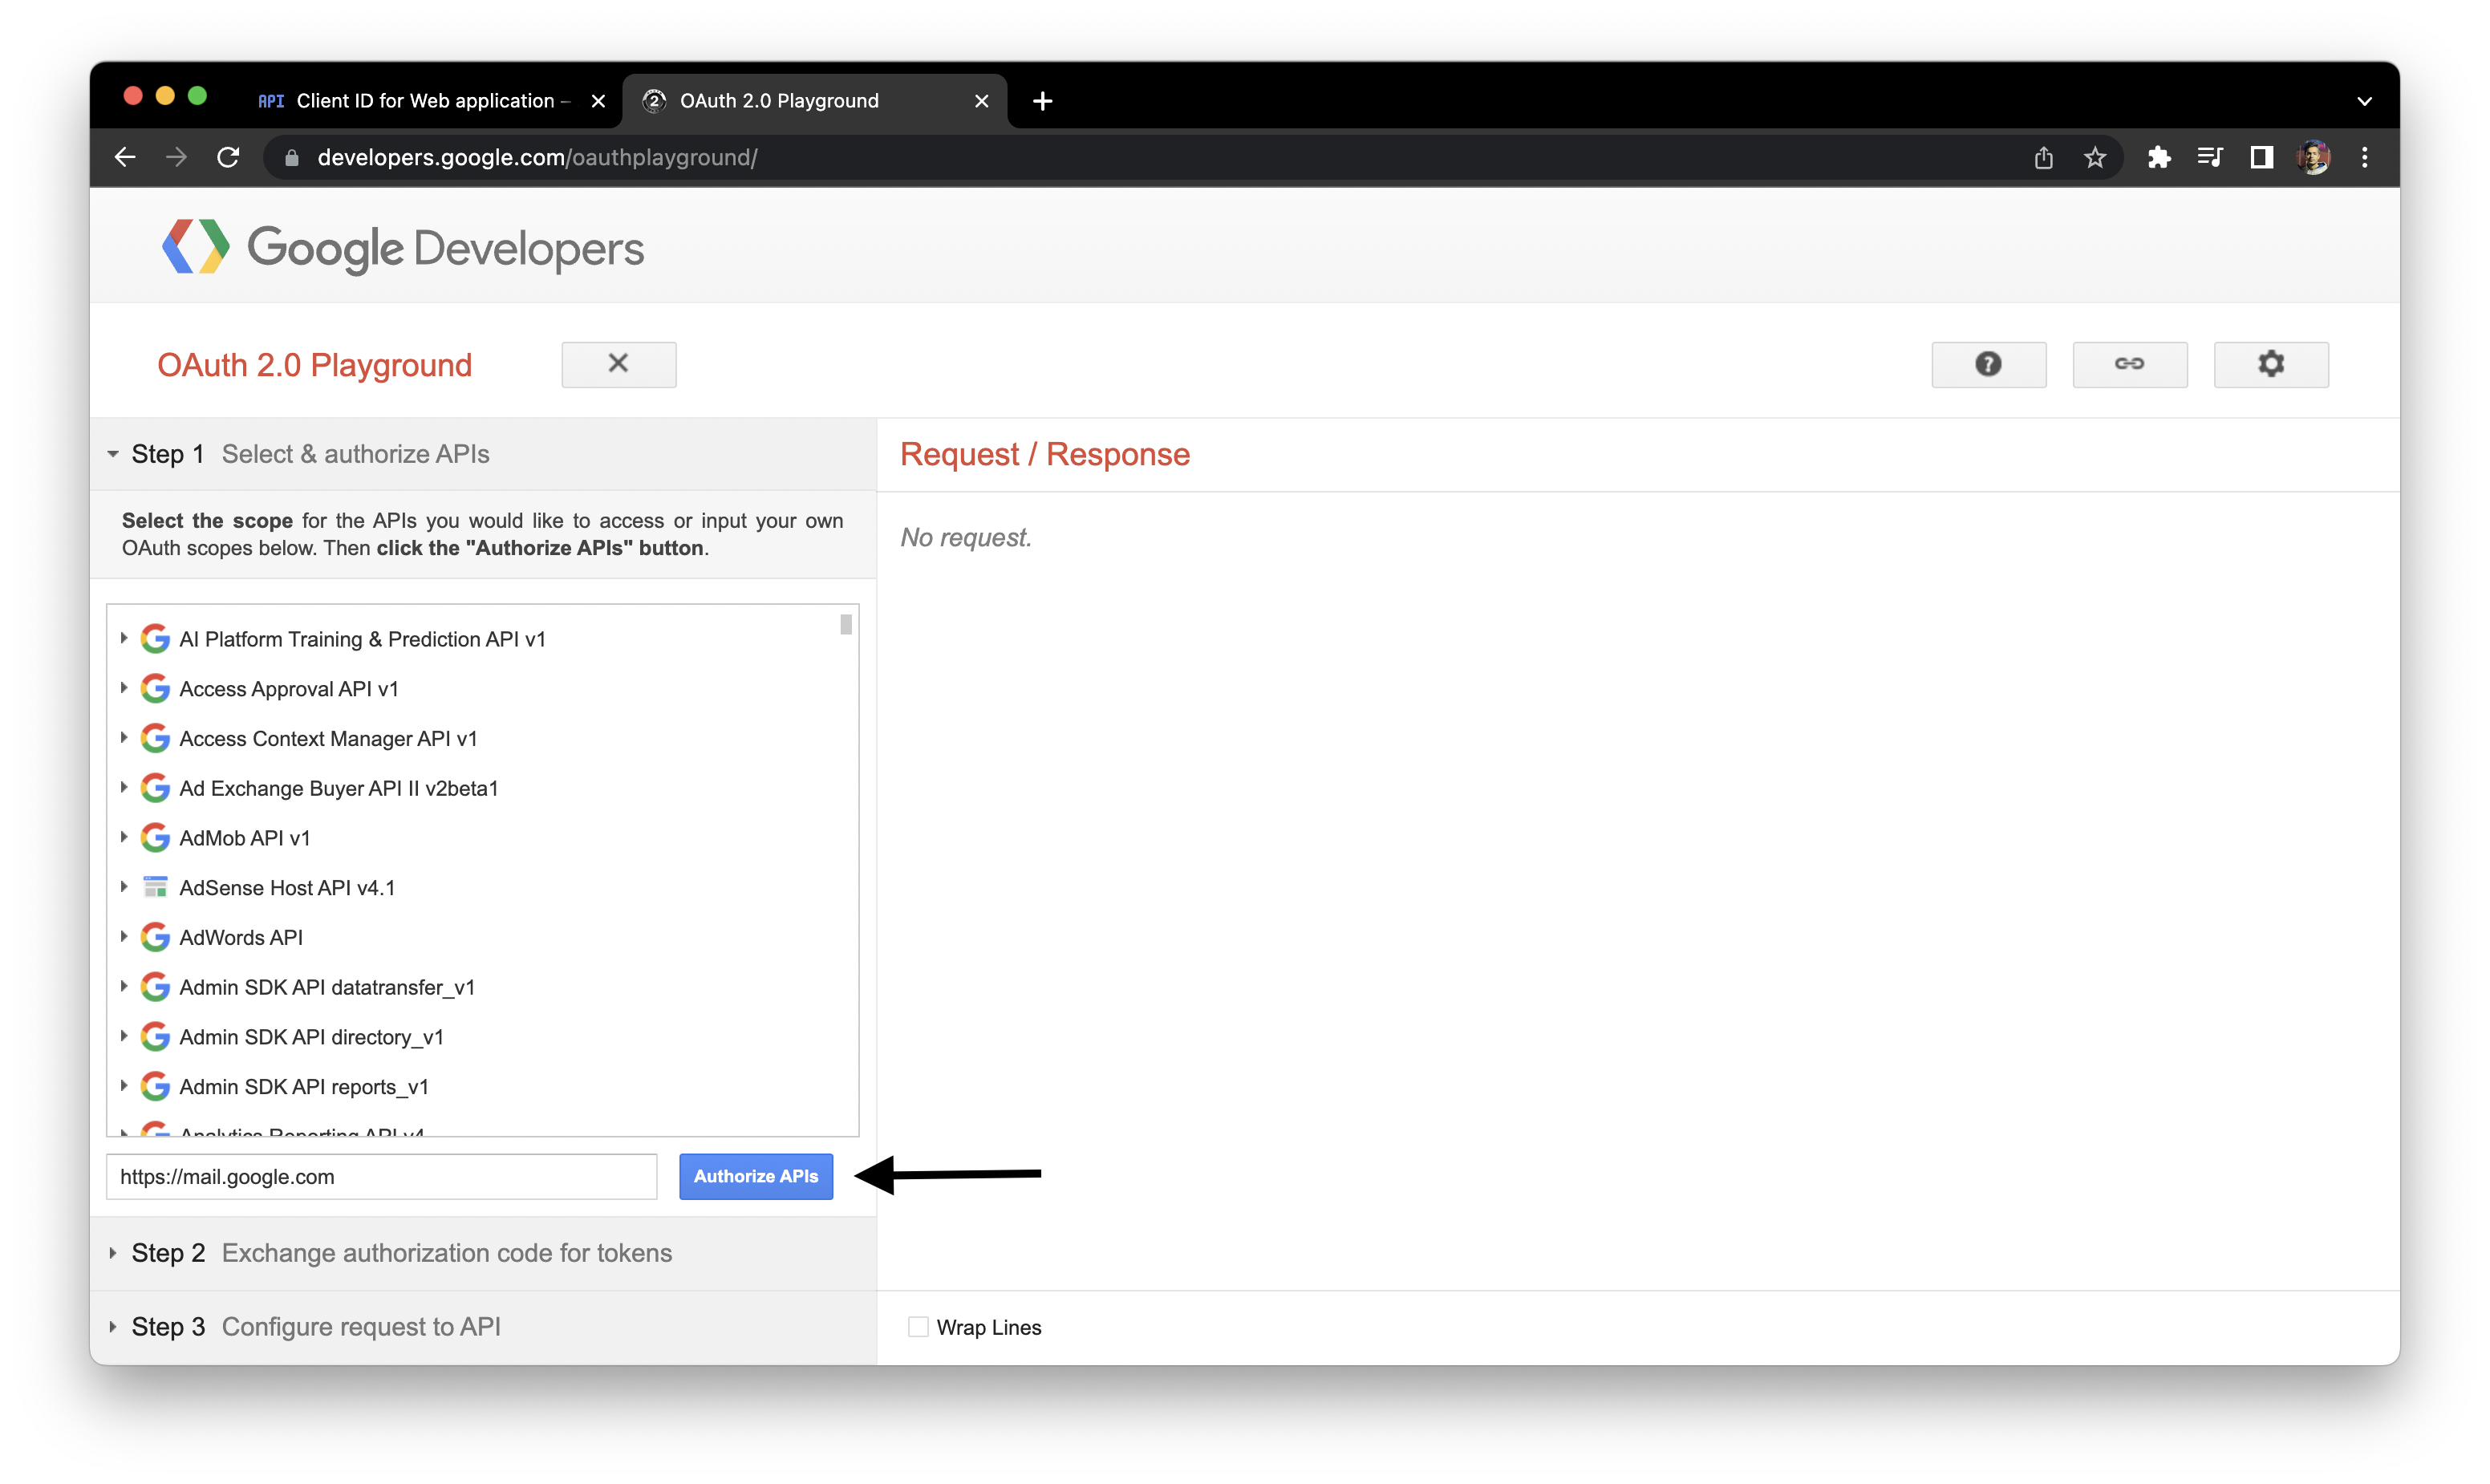
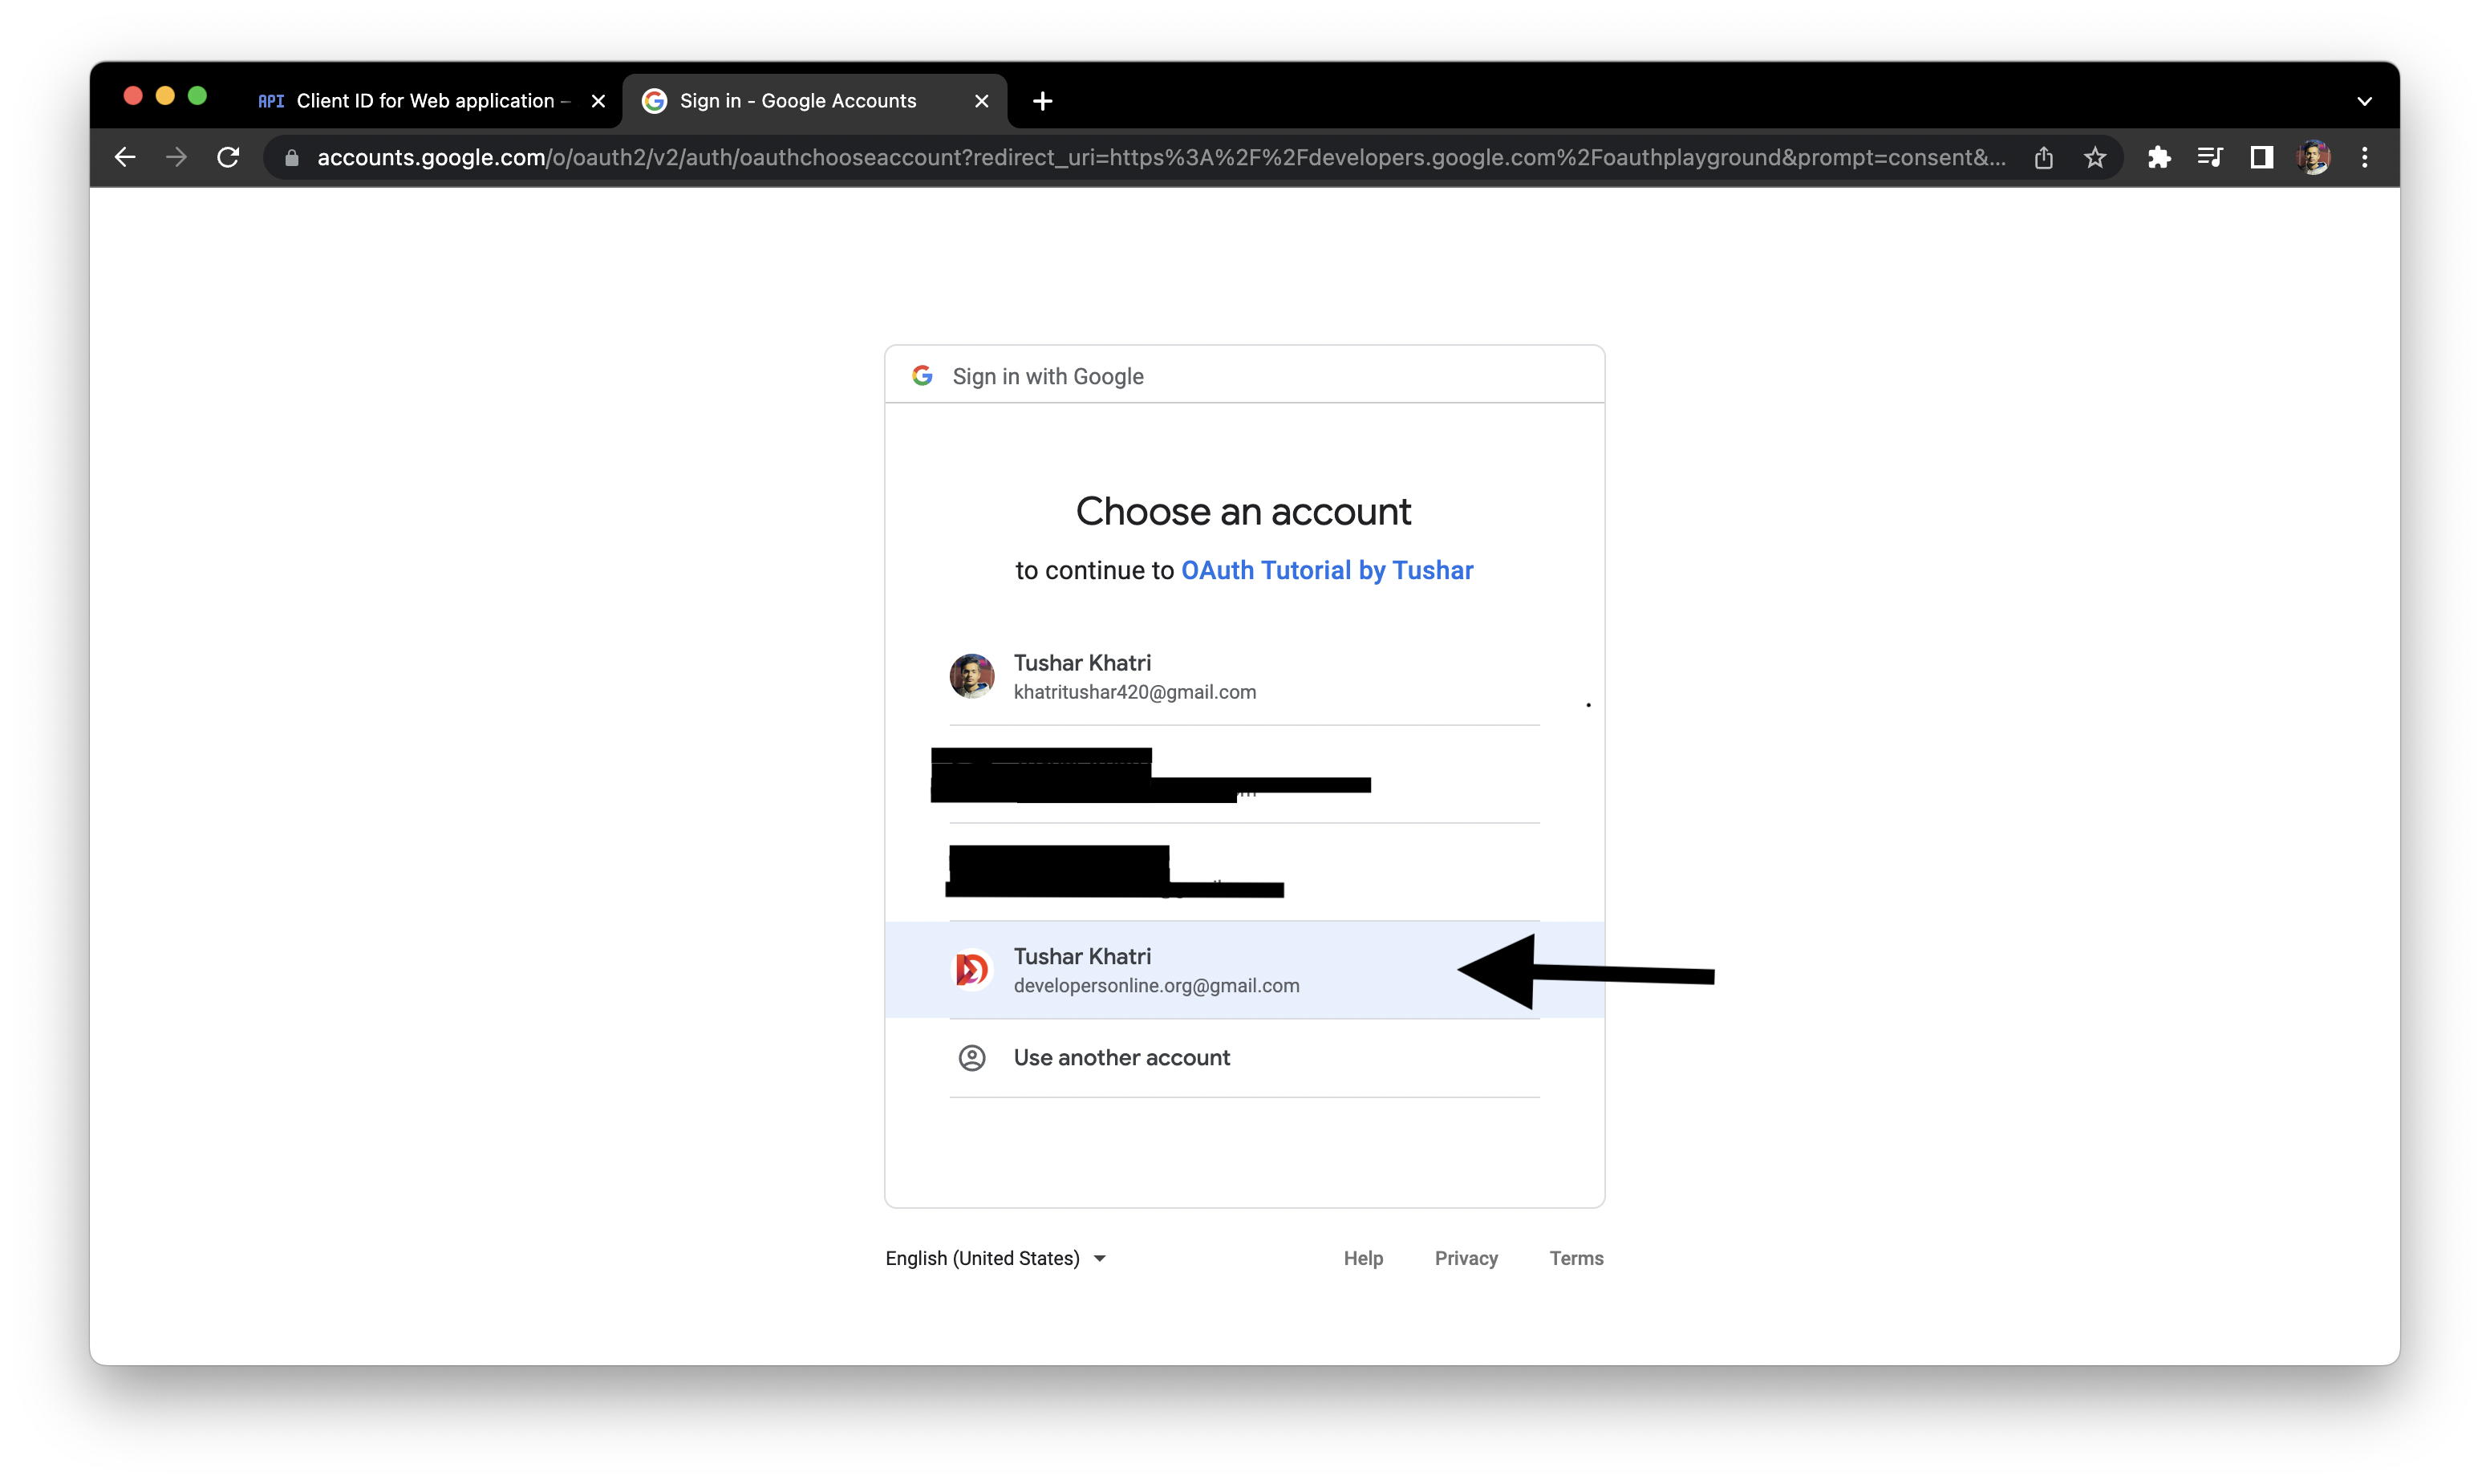
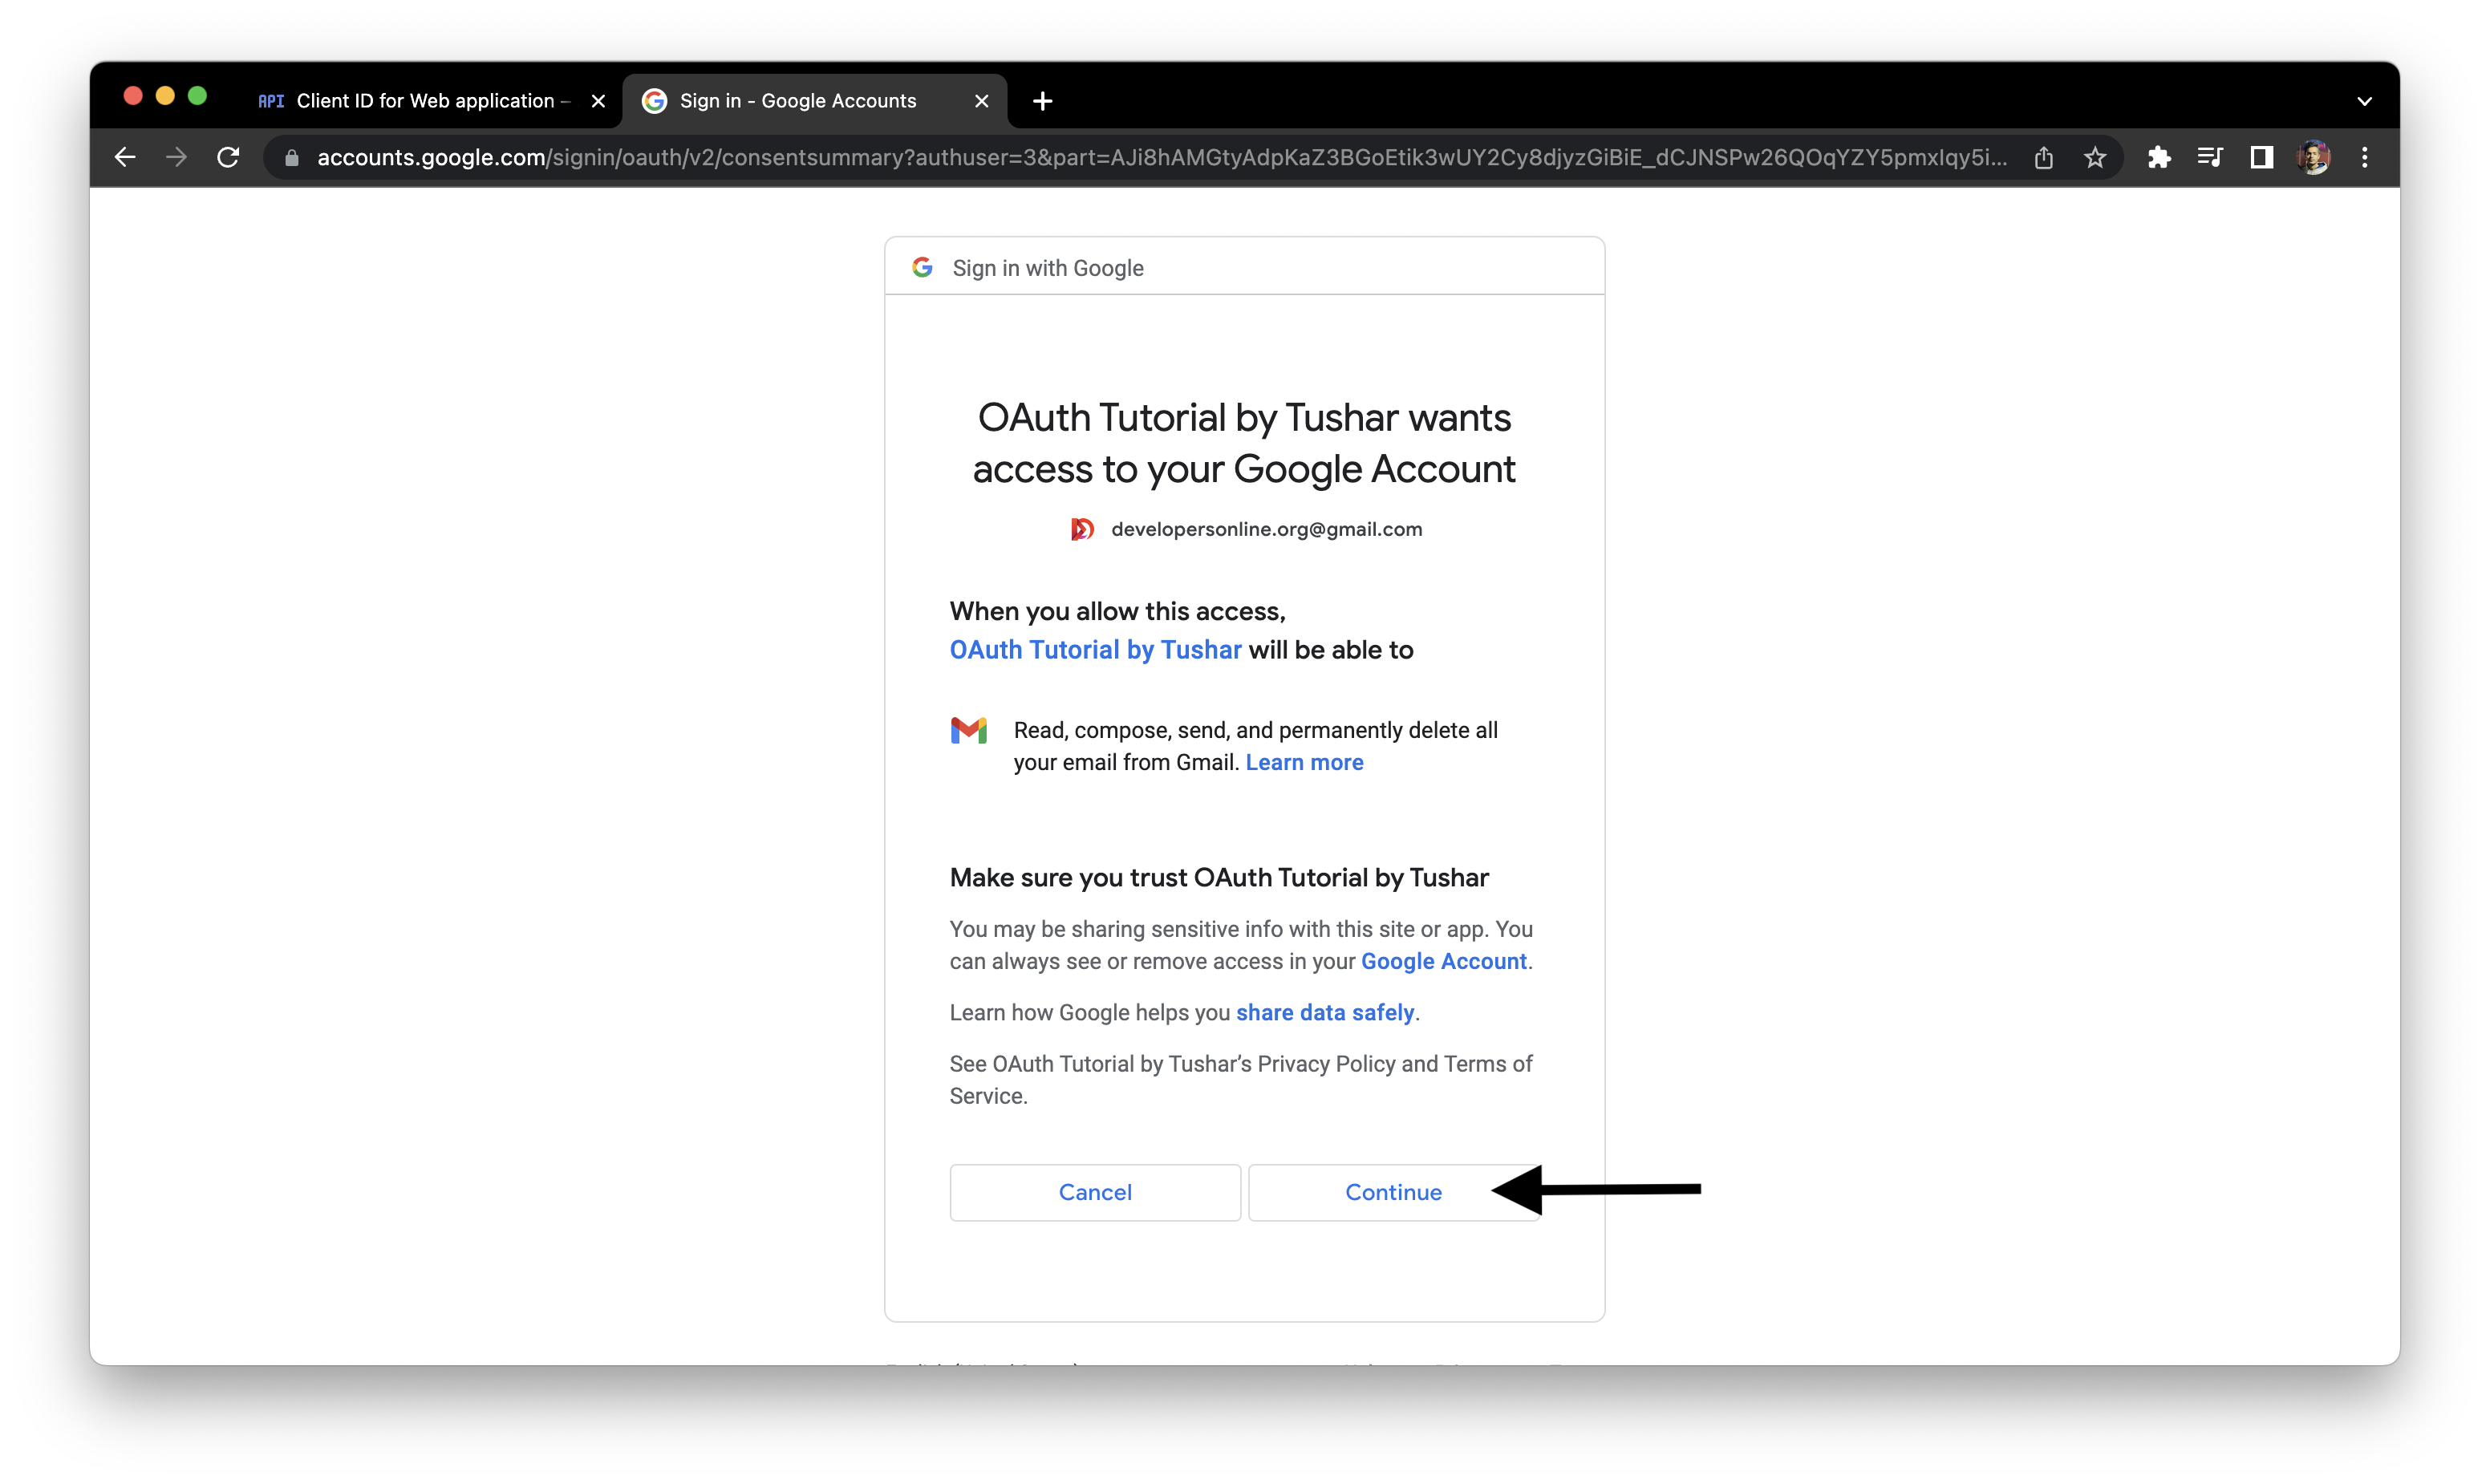
As you hit Authorize API's button, Google will ask you to verify your Gmail Id. Make sure to verify the Id you entered as the Test User while configuring the consent screen.

- Click on
Exchange Authorization code for tokensand copy theRefresh tokenfrom here.
We don't need to copy the Access token from here as it is not permanent and keeps on expiring. We will generate an Access token on the fly as and when needed from our node app.

Create a .env file in the root folder of your project and include all the secrets listed below in the same format.
you have to install and configure
dotenvpackage to make this work. If you are not sure what that is, please check the installation guide here!
CLIENT_ID="clientIdFromGoogleDeveloperConsole"
CLIENT_SECRET="clientSecretFromGoogleDeveloperConsole"
REDIRECT_URI="https://developers.google.com/oauthplayground"
REFRESH_TOKEN="refreshTokenFromGoogleDeveloperConsole"
Create a form with the post method.
<form action="/submit" method="post">
      <input type="text" name="name" placeholder="Your Name" id="name">
      <input type="email" name="email" placeholder="Email" id="email">
      <textarea name="message" rows="6" id="message" placeholder="Message"></textarea>
      <button type="submit">
</form>
Install the required packages
Run the following command from the root of your project to install googleapis and nodemailer npm packages.
npm i googleapis nodemailer
Configure oAuth2Client using the secrets stored in the .env file.
const oAuth2Client = new google.auth.OAuth2(process.env.CLIENT_ID, process.env.CLIENT_SECRET, process.env.REDIRECT_URI);

oAuth2Client.setCredentials({ refresh_token: process.env.REFRESH_TOKEN});
Handle post request and write the function to send emails
The form we created recently will send a post request to our server with the required form data, we will store this form data in Javascript constants.
app.post("/submit", (req, res) => {
       const sender name = req.body.name;
       const senderEmail = req.body.email;
       const senderMessage = req.body.message;
});
We will now write a function that takes senderName, senderEmail, senderMessage as parameters.
- Create a try-catch block inside the function
- In the try block generate the ACCESS_TOKEN on the fly using the
oAuth2Client.getAccessToken(); - Create a transport using
nodemailer.createTransport({}); - Create an object
mailOptionswith the following key-value pairs.const mailOptions = { from: "", to: "", subject: ``, text: ``, } - Use
transport.sendMail(mailOptions);to send the email. - Catch the error if any in the catch block.
This is how the function must look after putting everything together.
async function sendMail(senderName, senderEmail, senderMessage){
  try{
    const ACCESS_TOKEN = await oAuth2Client.getAccessToken();
    const transport = nodemailer.createTransport({
      service: 'gmail',
      auth: {
        type: 'OAuth2',
        user: '[email protected]',
        clientId: process.env.CLIENT_ID,
        clientSecret: process.env.CLIENT_SECRET,
        refreshToken: process.env.REFRESH_TOKEN,
        accessToken: ACCESS_TOKEN,
      },
    });

    const mailOptions = {
      from: "Bot <[email protected]>",
      to: "[email protected]",
      subject: `${senderEmail} sent you a message`,
      text: `Message from ${senderName}: ${senderMessage}`,
    }

    const result = await transport.sendMail(mailOptions);
    return result;


  }catch (error) {
    return error;
  }
}
Call the function. ✌️
app.post("/submit", (req, res) => {
       const sender name = req.body.name;
       const senderEmail = req.body.email;
       const senderMessage = req.body.message;

       sendMail(senderName, senderEmail, senderMessage)
       .then(result =>  console.log("Message Sent"))
       .catch(error => console.log(error.message));
});
If this article was helpful please consider following me on Instagram or GitHub. If you wish to find more such articles in your inbox please consider subscribing to my newsletter. Your appreciation is my fuel 😌.


